Maintaining your home keeps it comfortable, safe, and a place you love. As you embrace senior living, you discover the satisfaction of tackling small tasks yourself. Simple home repair projects empower you, keep your home running smoothly, and prevent minor issues from becoming major problems. You can handle many common household fixes with basic tools and a bit of know-how.
While you work on these physical repairs, it is also a great time to evaluate your overall home security to protect your hard work and peace of mind.
This guide provides practical, actionable steps for routine DIY maintenance, helping you keep your home in top shape. We also address when to call a professional, ensuring your safety and peace of mind.
The Value of DIY Maintenance: Staying Empowered
Taking charge of minor home repairs offers significant benefits for seniors and their families. It preserves your independence, saves money, and keeps your living space safe and comfortable. Proactive DIY maintenance helps catch small issues before they escalate into costly problems.
In addition to home repairs, eating healthy on a budget is another way to maintain your independence and well-being.
Maintaining your property well can even lead to financial benefits, such as homeowners insurance discounts for proactive upkeep.
Regular inspections and simple fixes contribute directly to your quality of life. You gain a sense of accomplishment and maintain control over your environment. This approach supports your goal of aging in place comfortably and securely.
An ounce of prevention is worth a pound of cure.
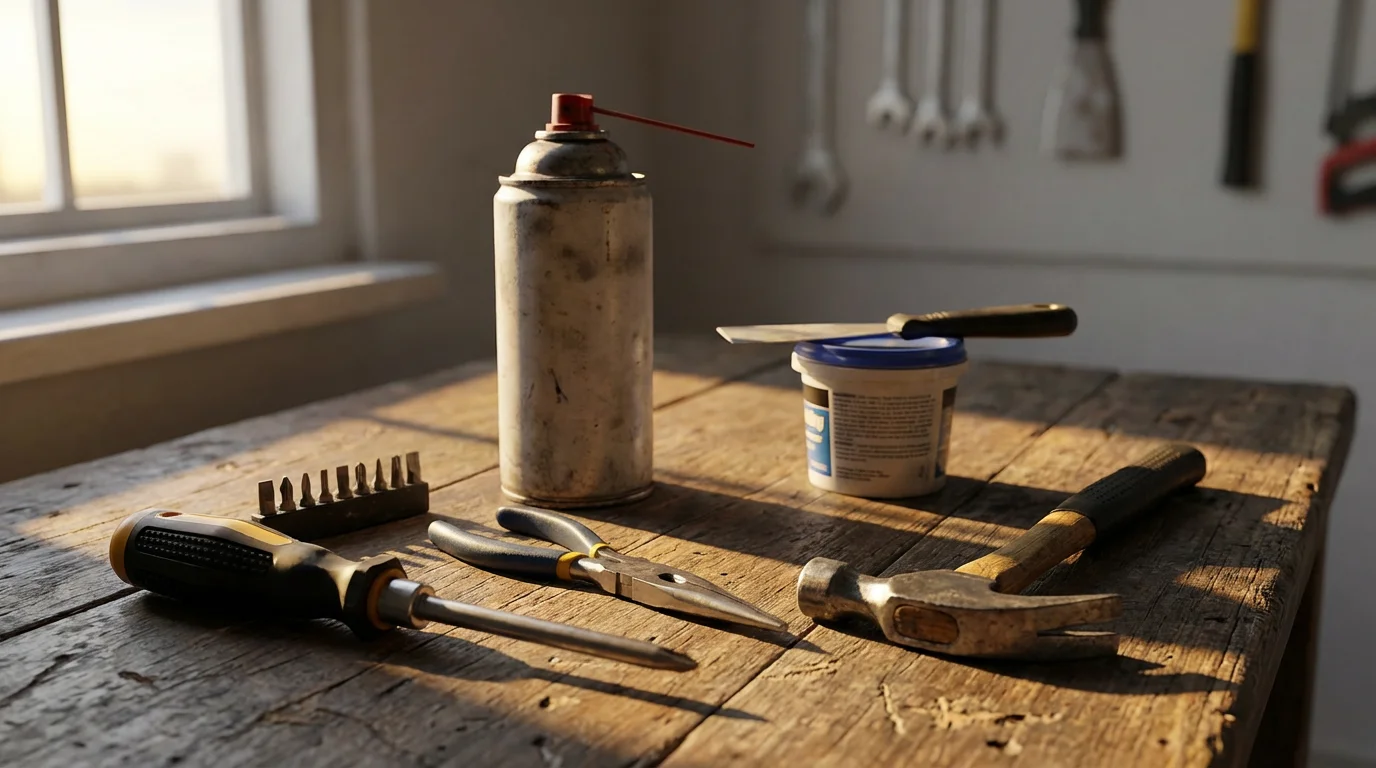
Essential Tools for Your DIY Toolkit
Equipping yourself with a basic set of tools makes many common home repairs straightforward. Focus on ergonomic, lightweight tools that are easy to grip and maneuver. You do not need a vast collection, just a few versatile items.
Selecting the right tools is just as important as designing an ergonomic home office that supports your daily activities and hobbies.
You might also consider incorporating smart home devices to automate tasks like lighting and climate control, reducing the need for manual adjustments.
Here is a list of recommended tools for a senior-friendly DIY toolkit:
- Screwdriver Set: Include both Phillips and flathead screwdrivers in various sizes. Look for those with comfortable, non-slip handles.
- Adjustable Wrench: A medium-sized adjustable wrench handles many nuts and bolts.
- Pliers: Needle-nose pliers and slip-joint pliers are useful for gripping, bending, and cutting.
- Hammer: A lightweight claw hammer is sufficient for small nailing tasks.
- Utility Knife: Keep a sharp utility knife for opening packages, cutting tape, or minor trimming. Always use it with caution.
- Measuring Tape: A 12-foot or 16-foot retractable tape measure is handy for various projects.
- Level: A small torpedo level ensures pictures and shelves hang straight.
- Flashlight or Headlamp: Essential for working in dimly lit areas. A headlamp leaves both hands free.
- Ladder or Step Stool: A sturdy, three-step folding step stool with a handrail provides safe access to higher areas. Always ensure it stands on a flat, stable surface.
- Safety Glasses and Gloves: Protect your eyes and hands during any repair work.
Consider keeping these tools in an easily accessible, lightweight toolbox. A clear top storage bin can help you see and find items quickly without heavy lifting.

Simple Repairs You Can Do Yourself
Many minor household annoyances have simple solutions you can implement yourself. These tasks improve your home’s functionality and prevent more significant issues. Remember to gather your tools and review the steps before you begin.
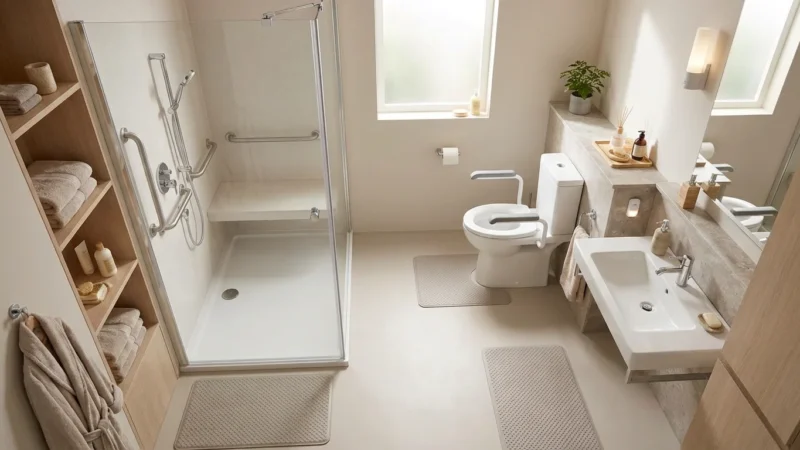
Once you have mastered basic repairs, you might also look into accessibility modifications in the bathroom to further enhance long-term home safety.
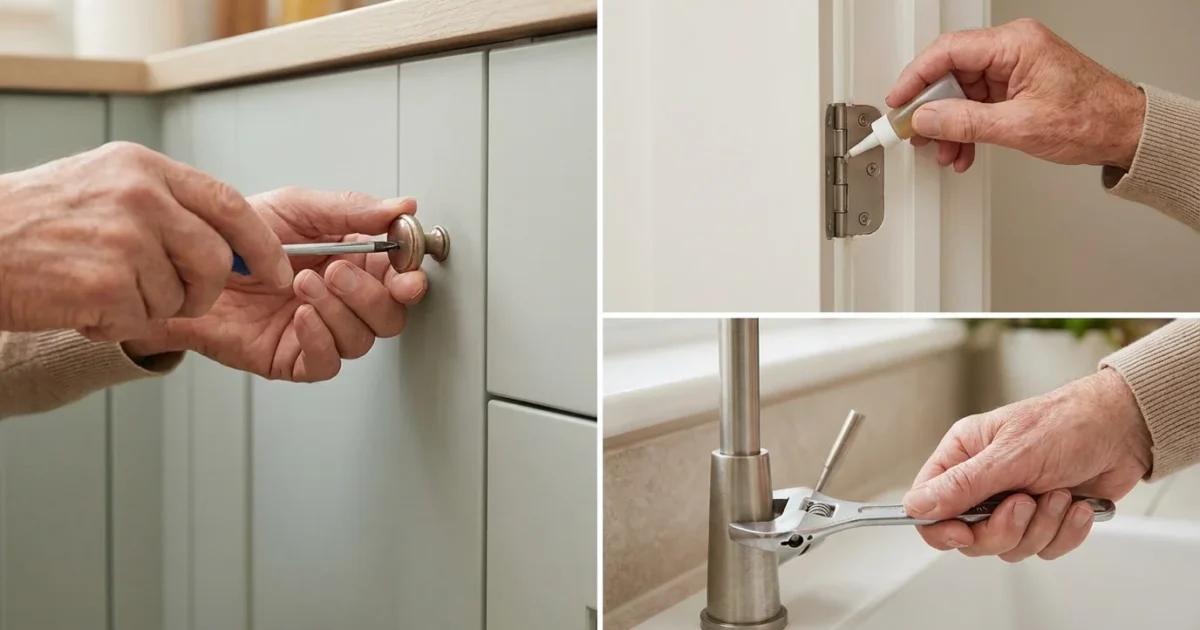
Tightening Loose Cabinet Handles and Knobs
Loose cabinet hardware feels flimsy and can eventually fall off. Tightening them is a quick fix.
Here is how you tighten cabinet hardware:
- Locate the Screws: Open the cabinet door or drawer. You usually find the screws on the inside, attaching the handle or knob.
- Select the Right Screwdriver: Choose a Phillips or flathead screwdriver that fits the screw head snugly.
- Tighten Carefully: Turn the screwdriver clockwise until the screw feels secure. Avoid overtightening, as this can strip the screw or crack the wood.
- Check for Stability: Gently wiggle the handle or knob to confirm it is firm.
This simple home repair takes only minutes and requires minimal effort.
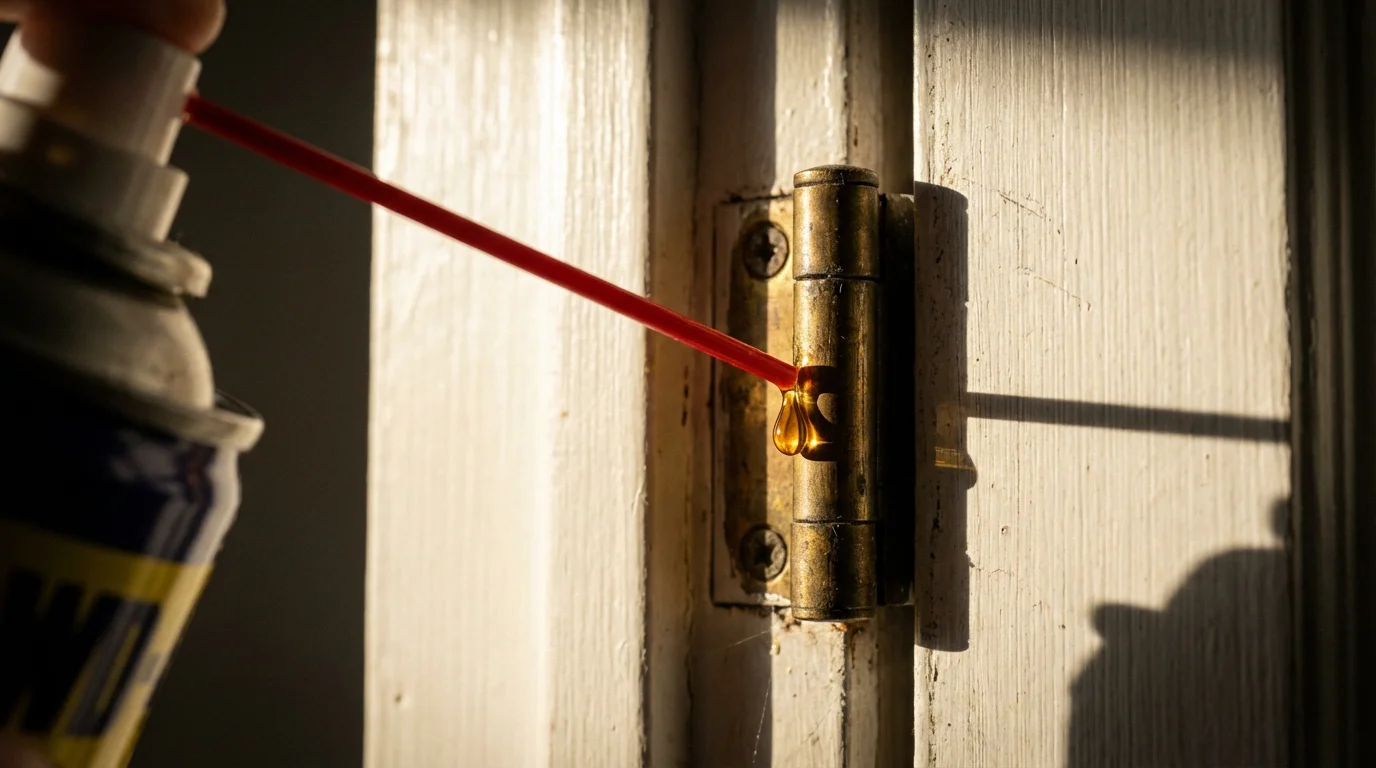
Fixing a Squeaky Door
A squeaky door is an annoying but easily fixable problem. The issue usually lies with dry or dirty hinges.
Follow these steps to silence a squeaky door:
- Identify Squeaking Hinges: Open and close the door a few times to pinpoint which hinge or hinges are causing the noise.
- Clean the Hinges (Optional): If hinges appear rusty or grimy, carefully tap out the hinge pins with a hammer and a nail. Clean pins and hinge barrels with a wire brush or rag.
- Apply Lubricant: Use a spray lubricant like WD-40 or silicone spray. Direct the spray nozzle directly into the top of each hinge, moving the door back and forth to distribute the lubricant. You can also use petroleum jelly or cooking oil if you do not have spray lubricant.
- Wipe Excess: Wipe away any excess lubricant with a cloth to prevent drips.
This quick DIY maintenance task restores quiet operation and extends the life of your door hinges.
Patching Small Nail Holes and Scuffs
Small holes from pictures or minor wall scuffs are common. Patching them keeps your walls looking fresh.
Here is how you patch minor wall damage:
- Clean the Area: Wipe the wall around the hole or scuff with a damp cloth to remove dust or grime. Let it dry completely.
- Apply Spackle: Use a small amount of spackle or lightweight joint compound on your finger or a putty knife. Press it firmly into the hole, ensuring it fills completely.
- Smooth the Surface: Scrape off any excess spackle with the putty knife or your finger, making the patched area flush with the wall.
- Allow to Dry: Let the spackle dry according to the product instructions. This usually takes 30 minutes to a few hours.
- Sand Lightly (Optional): Once dry, lightly sand the area with fine-grit sandpaper (120-180 grit) until smooth.
- Touch Up Paint: Apply a small amount of matching paint with a small brush or dabber.
This repair improves the appearance of your walls without significant effort. Small tubes of spackle are available for under $10.
Replacing a Furnace or AC Filter
A clean furnace or air conditioning filter ensures good air quality and system efficiency. You should replace filters every 1-3 months, depending on usage and household pets.
Follow these steps to replace your filter:
- Locate the Filter Slot: Your filter usually slides into a slot near the furnace or air handler. Look for an arrow indicating airflow direction.
- Note Filter Size: The existing filter will have its dimensions printed on the frame (e.g., 20x25x1). Purchase a new filter of the exact same size.
- Turn Off the System: For safety, turn off your furnace or AC unit at the thermostat or the main power switch near the unit.
- Remove the Old Filter: Slide out the old, dirty filter. Note the direction of the airflow arrow.
- Insert the New Filter: Slide in the new filter, ensuring the airflow arrow points in the same direction as the old one (usually toward the furnace).
- Turn On the System: Restore power to your furnace or AC unit.
New filters typically cost between $10 and $30 each. This DIY maintenance task keeps your indoor air clean and your energy bills lower.
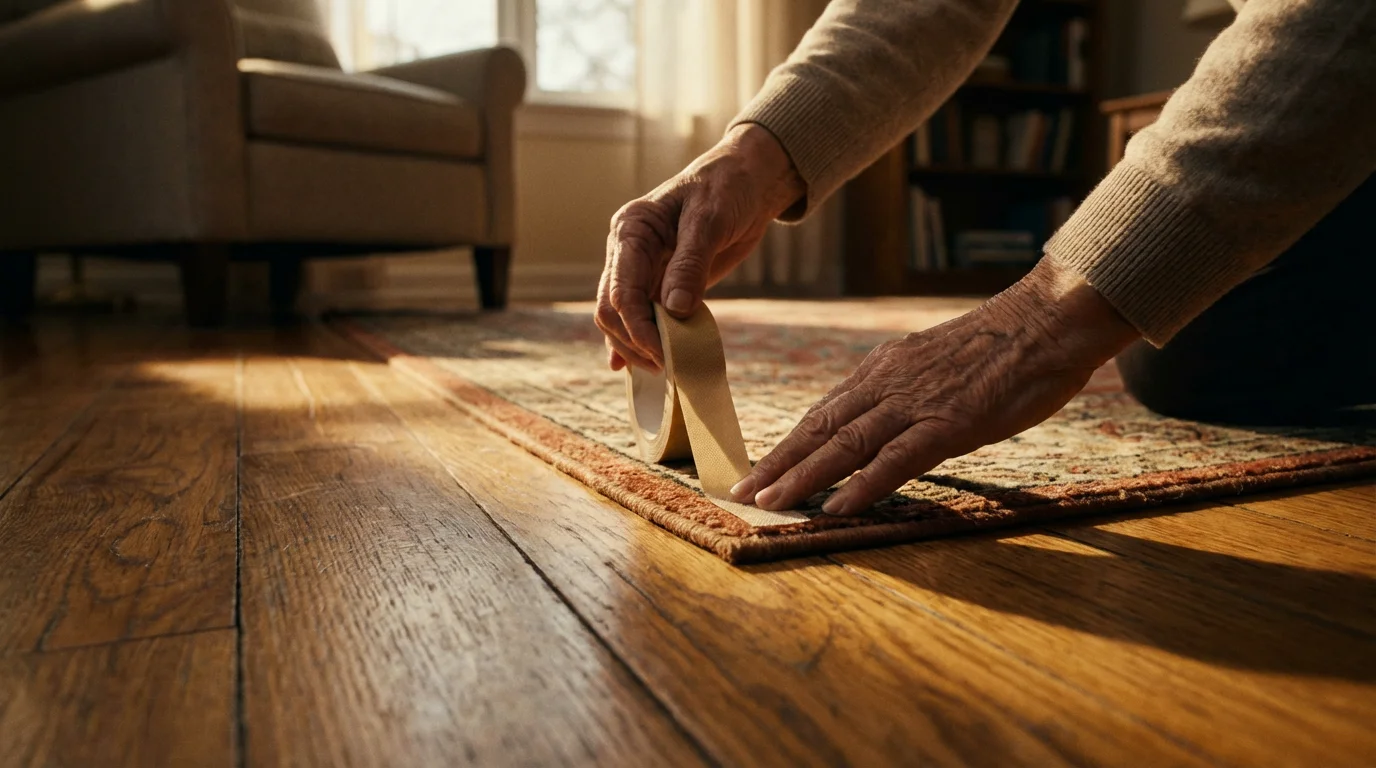
Securing Loose Rugs and Mats
Loose rugs and mats are significant trip hazards, especially for seniors. Securing them is a critical fall prevention measure. The CDC highlights falls as a leading cause of injury among older adults.
Here are effective ways to secure rugs and mats:
- Non-Slip Rug Pads: Place a rubber or felt non-slip pad underneath area rugs. These pads grip both the floor and the rug, preventing movement.
- Double-Sided Carpet Tape: For smaller rugs or runners, apply double-sided carpet tape to the underside edges and corners. Press firmly to adhere to the floor.
- Rubber Backing: Choose rugs with built-in rubber backing, particularly for bathrooms and entryways.
- Remove Tripping Hazards: Consider removing rugs entirely in high-traffic areas if they pose a persistent hazard.
This simple fix significantly reduces your risk of falls. Non-slip pads cost $10-$40, depending on size. Double-sided tape is typically under $15.
Clearing a Slow Sink Drain
A slow-draining sink is often caused by a buildup of hair, soap scum, or grease. You can frequently clear minor clogs yourself without harsh chemicals.
Follow these steps to clear a slow drain:
- Remove the Stopper: Pull out or unscrew the sink stopper to access the drain opening.
- Use a Drain Snake or Hair Catcher: Insert a plastic drain snake (a long, flexible tool with barbs) or even a straightened coat hanger into the drain. Gently push it down and twist to snag hair and debris. Pull it out slowly. These plastic snakes are available for under $10.
- Boiling Water Flush: Pour a kettle of boiling water down the drain. This can help dissolve grease and soap scum.
- Baking Soda and Vinegar: Pour 1/2 cup of baking soda down the drain, followed by 1/2 cup of white vinegar. Let it sit for 30 minutes to an hour. The mixture creates a fizzing reaction that can break down clogs. Follow with a flush of hot water.
- Repeat if Necessary: If the drain remains slow, repeat the process.
Avoid harsh chemical drain cleaners, as they can damage pipes and pose health risks.
Changing Light Bulbs in Hard-to-Reach Fixtures
Changing light bulbs, especially in high ceilings or recessed fixtures, requires care. Using the right tools ensures safety.
Here is how you safely change a light bulb:
- Ensure Stability: Use a sturdy step stool or a ladder with a handrail. Position it on a flat, stable surface. Have someone spot you if you feel unsteady.
- Turn Off Power: Turn off the light switch. For extra safety, switch off the circuit breaker that controls the light fixture.
- Allow Bulb to Cool: Wait a few minutes for the old bulb to cool down before handling it.
- Remove Old Bulb: Carefully unscrew the old bulb counter-clockwise. For recessed lights, you might need to use a suction cup bulb changer, which attaches to a pole.
- Insert New Bulb: Screw in the new bulb clockwise until it is snug. Do not overtighten. Use the appropriate wattage and bulb type for your fixture.
- Restore Power: Turn the circuit breaker back on, then the light switch, to test the new bulb.
Light bulb changers on extendable poles cost around $20-$40 and make reaching high fixtures much safer.
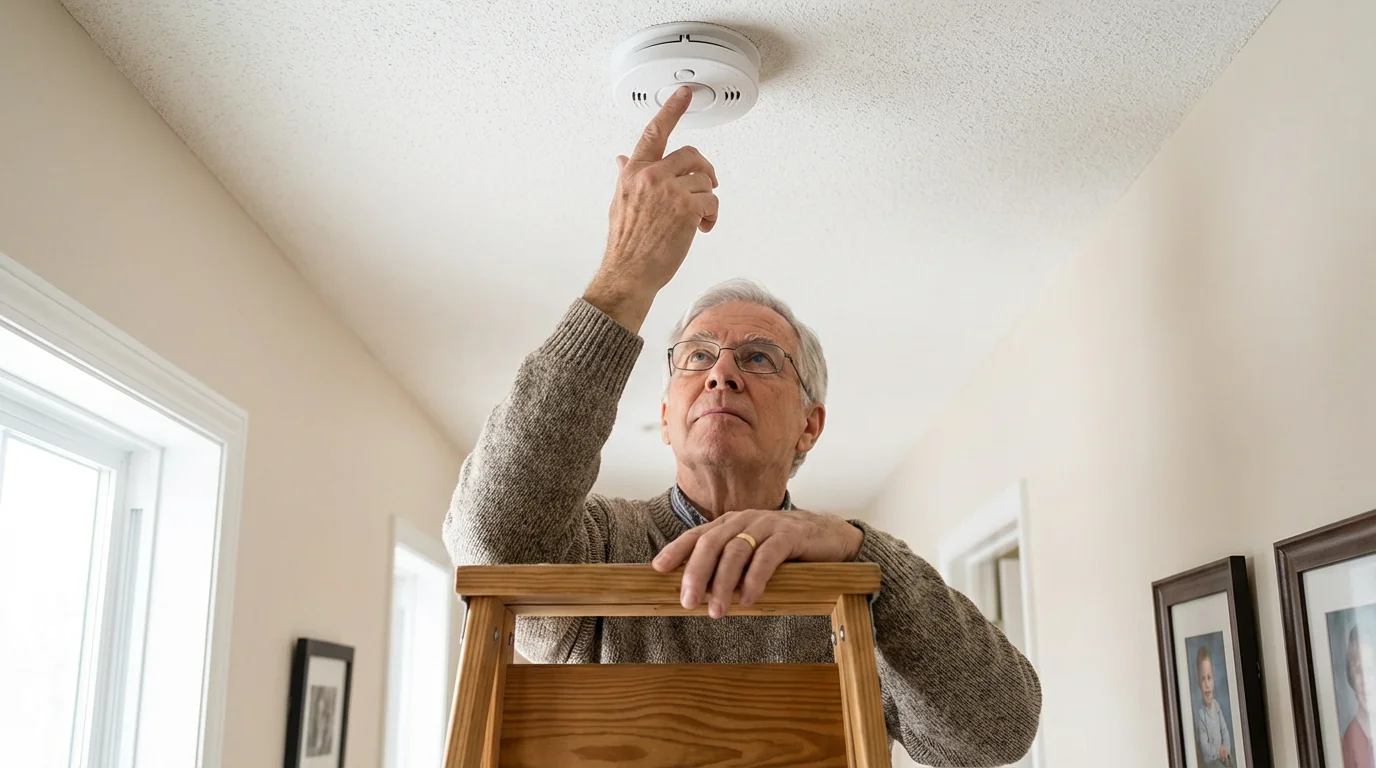
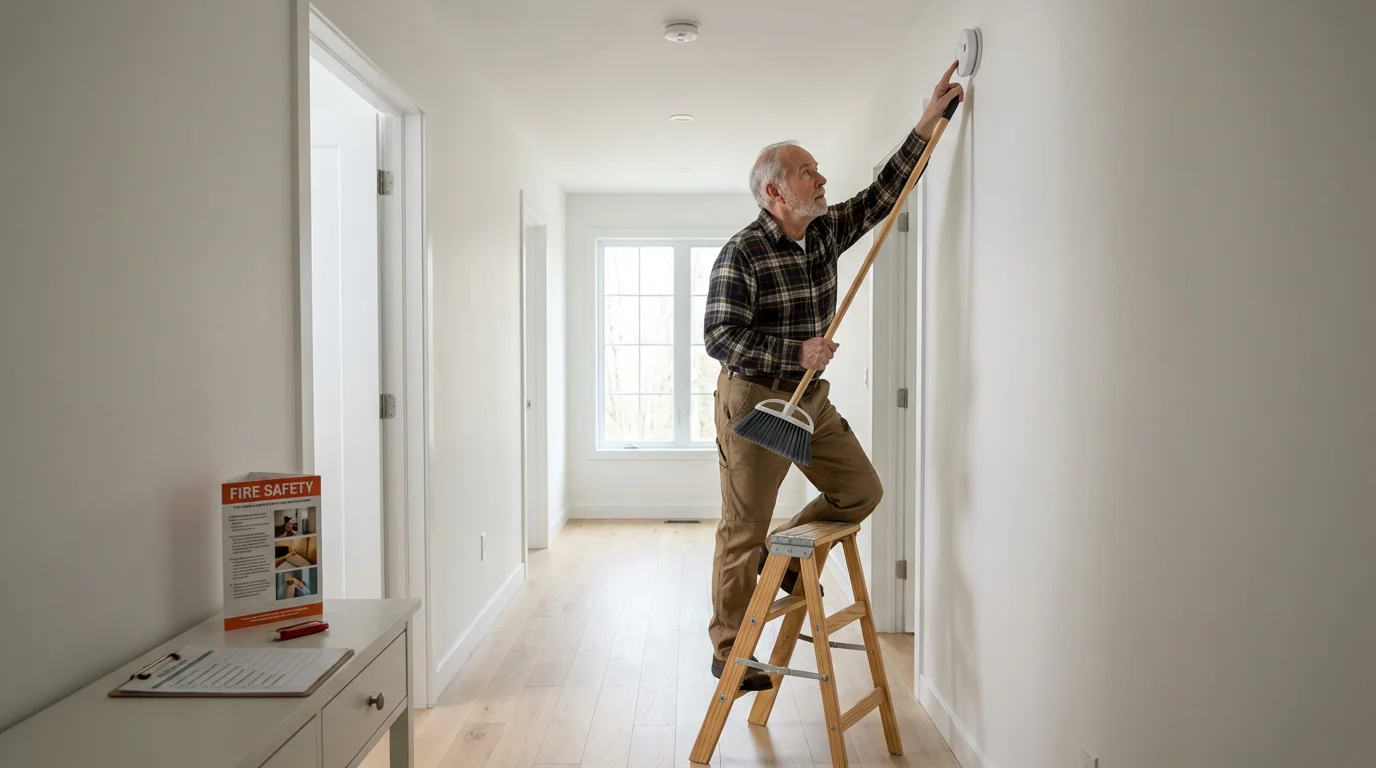
Prioritizing Home Safety Through Maintenance
Regular home maintenance directly contributes to a safer living environment. Many simple repairs prevent hazards that can lead to falls or other accidents. Taking proactive steps to address potential risks makes your home more secure.
Consider these safety-focused maintenance tasks:
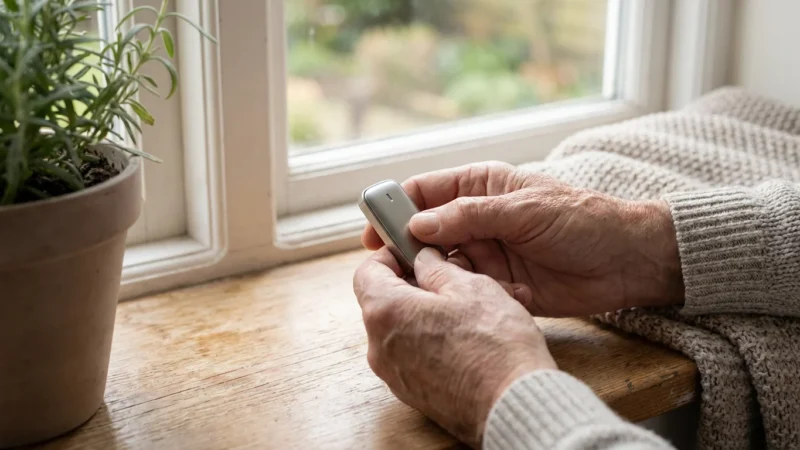
- Test Smoke and Carbon Monoxide Detectors: Press the test button monthly. Replace batteries annually, or when the detector chirps. Smoke detectors should be replaced every 10 years, and carbon monoxide detectors every 5-7 years, according to the Consumer Product Safety Commission.
- Check Pathways for Obstructions: Ensure hallways, stairs, and walking paths remain clear of clutter, loose wires, or small items.
- Inspect Handrails: Verify that all handrails on stairs are secure and firmly attached. Tighten any loose screws.
- Ensure Adequate Lighting: Replace dim or burnt-out bulbs promptly. Add nightlights in hallways, bathrooms, and bedrooms to prevent nighttime falls.
- Clear Outdoor Walkways: Keep sidewalks and entryways free of debris, leaves, snow, and ice to prevent slips.
These actions support your goal of independent living by creating a safer, more predictable home. Your attention to these details significantly reduces accident risks.
When to Call a Professional: Knowing Your Limits
While many simple repairs are within your capabilities, recognizing when a job requires professional expertise is crucial for your safety and the integrity of your home. Attempting complex repairs without the proper skills, tools, or physical ability can lead to injuries or more expensive damage.
You should always call a professional for these situations:
- Electrical Work: Beyond changing a light bulb or resetting a circuit breaker, leave all electrical repairs to a licensed electrician. This includes wiring issues, outlet replacements, or new fixture installations. Electrical fires are a serious risk.
- Major Plumbing Leaks or Installations: While you might clear a slow drain, extensive leaks, burst pipes, water heater issues, or installing new fixtures require a licensed plumber. Water damage can be very costly.
- Structural Issues: Cracks in foundations, sagging ceilings, or roof damage are serious and need evaluation by a structural engineer or a qualified contractor.
- HVAC System Repairs: For problems with your furnace, air conditioner, or ventilation system beyond changing a filter, consult an HVAC technician. Improper repairs can void warranties or create safety hazards.
- Repairs Requiring Heavy Lifting or Climbing: If a task involves lifting heavy objects, extensive bending, or climbing tall ladders, hire help. Your safety is paramount.
- Any Job You Do Not Feel Comfortable Doing: Trust your instincts. If a repair seems too complicated or unsafe, it is always better to delegate it.
Calling a professional ensures the job gets done correctly and safely, providing you with peace of mind. Investing in expert help for complex tasks protects your home and your well-being.

Finding Reliable Handymen and Contractors
Finding trustworthy help for home repairs and maintenance is essential. You want someone reliable, skilled, and respectful. Whether you need assistance with one-time projects or ongoing maintenance, a good handyman or contractor becomes a valuable resource. How to find reliable handymen services? Several strategies can help you locate qualified professionals.
Consider these steps when searching for help:
- Ask for Recommendations: Talk to friends, neighbors, or family members. Personal referrals often lead to excellent service providers. Your local community center or senior organizations might also have lists of trusted local professionals.
- Check Online Directories and Review Sites: Websites like Angie’s List, HomeAdvisor, or Yelp offer contractor listings and customer reviews. Pay attention to ratings and read multiple reviews.
- Contact Professional Associations: Some trades have professional associations that can provide lists of certified or licensed members in your area. For example, local plumber or electrician associations.
- Eldercare Locator: The Eldercare Locator, a public service of the U.S. Administration for Community Living, connects you to services for older adults and their families, which can include home repair assistance. You can find more information at eldercare.acl.gov.
- Verify Credentials: For significant jobs, ensure the contractor is licensed and insured. Ask for proof of insurance to protect yourself in case of accidents on your property.
- Get Multiple Quotes: Obtain at least three written estimates for any substantial repair or project. This helps you compare pricing, understand the scope of work, and identify any discrepancies. Ensure quotes are detailed, breaking down labor and material costs.
- Check References: Ask for references from past clients and follow up with them. Inquire about their experience with the contractor’s professionalism, punctuality, and quality of work.
- Outline Expectations Clearly: Before work begins, discuss your expectations, the project timeline, and payment terms. A clear agreement prevents misunderstandings.
Handyman services typically charge an hourly rate, ranging from $50 to $100 per hour, or a flat fee for specific tasks. For larger projects, expect higher costs. For example, a minor plumbing repair might cost $150-$300, while electrical work could range from $200-$500 for a small job. Always ask for a written estimate before work starts.

Seasonal Home Preparation for Ongoing Comfort
Proactive seasonal maintenance ensures your home remains comfortable and efficient throughout the year. Dedicating time to these tasks prevents unexpected issues and prepares your home for changing weather. This approach is an integral part of effective home repair and DIY maintenance.
Consider these seasonal checks:
- Spring:
- Clean gutters and downspouts of debris. This prevents water damage to your roof and foundation.
- Inspect exterior for cracks or peeling paint. Address small issues promptly.
- Check outdoor faucets for leaks after winter freezes.
- Summer:
- Inspect air conditioning unit. Ensure it is free of debris. Schedule professional service if needed.
- Check windows and doors for drafts. Replace weather stripping if worn.
- Ensure smoke detectors and carbon monoxide detectors function correctly.
- Fall:
- Clean gutters again as leaves fall.
- Check heating system filters and schedule a furnace tune-up if due.
- Seal any cracks or gaps around windows and doors to prepare for colder weather.
- Test your home’s exterior lighting.
- Winter:
- Check for drafts and cold spots, adding insulation or weatherstripping as needed.
- Ensure adequate heating, setting a comfortable and safe temperature.
- Clear snow and ice from walkways and entryways promptly.
These seasonal preparations minimize stress and keep your home resilient against the elements. You can often handle many of these checks with minimal tools and effort. For guidance on saving energy, you can consult resources from Energy.gov.
Budgeting for Home Maintenance
Anticipating and budgeting for home maintenance costs is a smart financial strategy. Unexpected repairs can strain your budget, so setting aside funds regularly helps you manage these expenses without stress. This is crucial for long-term senior living.
Here are practical budgeting tips:
- The 1% Rule: A common guideline suggests allocating 1% of your home’s value annually for maintenance. For a $300,000 home, this means $3,000 per year, or $250 per month.
- Create a Dedicated Savings Account: Set up a separate savings account specifically for home maintenance and repairs. Automate monthly transfers to build this fund over time.
- Prioritize Repairs: Address critical safety issues, such as a leaky roof or faulty wiring, immediately. Cosmetic repairs can wait if funds are limited.
- Track Expenses: Keep a record of all your home repair and maintenance costs. This helps you understand where your money goes and refine your budget for the following year.
- Leverage DIY for Savings: By performing simple repairs yourself, you save on labor costs, stretching your budget further.
- Seek Discounts: Some contractors offer senior discounts. Always ask if any are available.
Effective budgeting gives you control over your home’s health and reduces financial surprises. It empowers you to maintain your home confidently, ensuring it remains a safe and comfortable space for years to come.
Frequently Asked Questions
What simple repairs can seniors do themselves?
Many seniors can confidently perform simple home repairs such as tightening loose cabinet handles, lubricating squeaky doors, patching small nail holes, replacing furnace filters, and securing loose rugs. These tasks require basic tools and minimal physical effort, contributing to a safer and more comfortable home environment.
How often should I check my smoke detector batteries?
You should test your smoke detector’s alarm monthly by pressing the test button. Replace the batteries at least once a year, or immediately if the detector emits a chirping sound indicating low battery power. Remember to replace the entire smoke detector unit every 10 years for optimal function.
Is it safe for me to use a ladder for high repairs?
For high repairs, always prioritize safety. Use a sturdy, three-step folding step stool with a handrail for tasks like changing light bulbs. Ensure it sits on a flat, stable surface. For anything requiring a taller ladder or extensive reach, or if you feel unsteady, it is safer to ask for help from a family member or hire a professional handyman. Your well-being is more important than a DIY repair.
How can I find reliable handymen services?
To find reliable handymen services, start by asking for recommendations from trusted friends, family, or neighbors. Check online directories with customer reviews, such as Angie’s List or HomeAdvisor. You can also consult the Eldercare Locator for local resources. Always verify credentials, obtain multiple written quotes, and check references before hiring anyone.
What is the average cost of handyman services?
Handyman services typically charge between $50 to $100 per hour, or they may offer a flat rate for specific common tasks. The total cost depends on the complexity and duration of the job, as well as your geographic location. Always request a detailed written estimate before the work begins to understand all charges.
Disclaimer: This article is for informational purposes only. Home modifications, safety equipment, and services mentioned may vary in availability and suitability for individual circumstances. For significant home modifications, consult with qualified professionals. For health-related safety concerns, consult with healthcare providers.


Leave a Reply