
Connecting to the internet wirelessly, known as Wi-Fi, often feels like a puzzle for many. You may find yourself wondering where to begin or what to do when your connection suddenly stops working. This article provides clear, step-by-step guidance to help you understand Wi-Fi, connect your devices, keep your home network secure, and resolve common issues. You will gain the confidence to manage your own wireless internet connection, ensuring you stay connected to family, friends, and the information you need.
Beyond staying in touch, a reliable and secure network can also help you qualify for homeowners insurance discounts if you use it to power a home monitoring system.

What is Wi-Fi? Your Wireless Internet Connection Explained
Wi-Fi is simply a way for your devices to connect to the internet without using physical cables. Think of it as an invisible cable that broadcasts internet signals throughout your home or wherever you happen to be. This wireless internet connection allows your smartphone, tablet, laptop, smart TV, and other devices to access websites, send emails, stream videos, and much more.
A reliable connection is also the foundation for accessing healthcare remotely via telehealth appointments from your living room.
The beauty of Wi-Fi lies in its convenience. You can move around your home, from the living room to the kitchen, and remain connected to the internet. Understanding this basic concept is the first step in feeling more comfortable with your home network.
Technology is just a tool. It is how you use it that matters.
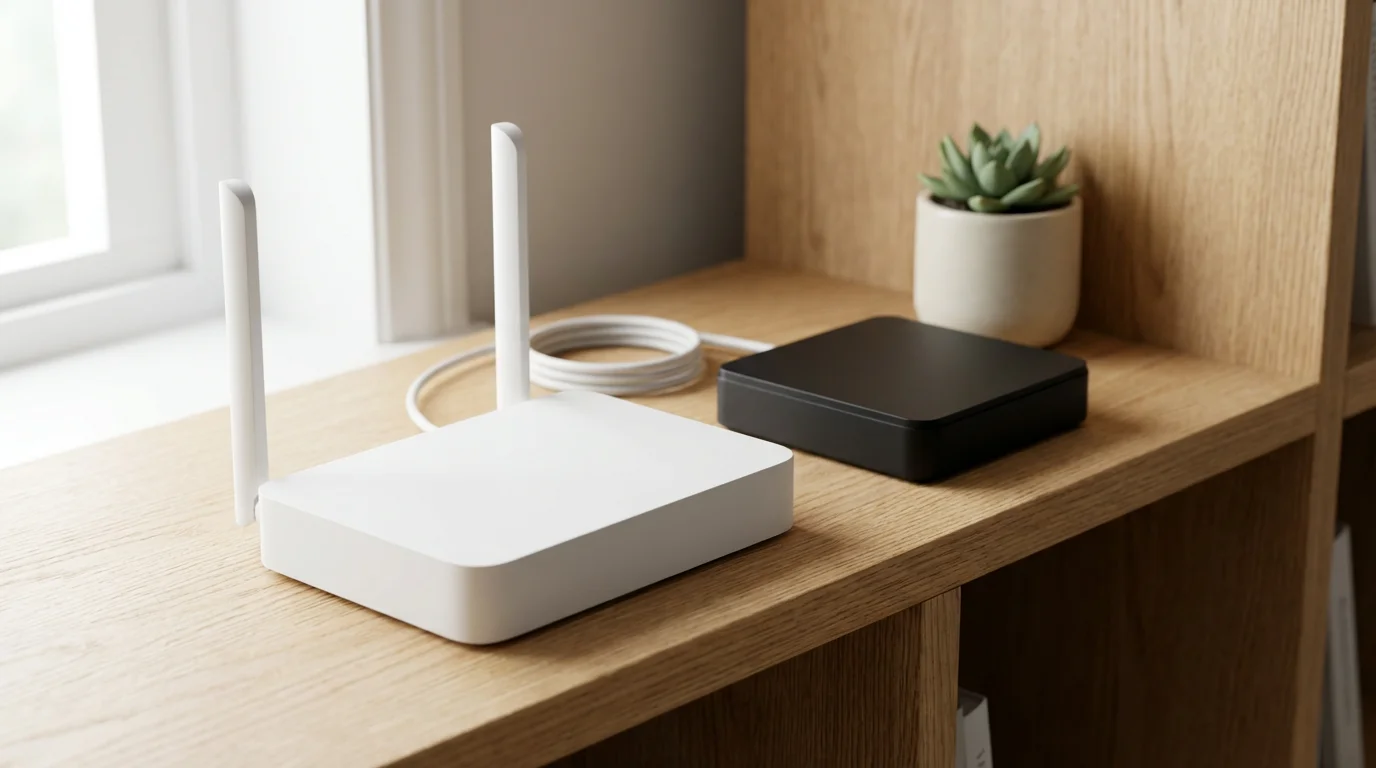
Understanding Your Home Network: Router, Modem, and Network Name
Before you connect, it helps to know the key components of your home network. These devices work together to bring the internet into your home and distribute it wirelessly.
Keeping your networking equipment clean and well-ventilated is a simple but effective part of proactive home maintenance.
The Modem: Your Internet Gateway
Your modem is the device that connects your home to the internet service provider, or ISP, like Xfinity, Spectrum, or AT&T. It translates the internet signal from the outside world into a format your home network can use. You often find the modem connected to a cable outlet or phone line in your home.
The Router: Creating Your Wireless Network
The router is the device that creates your personal Wi-Fi network. It takes the internet signal from the modem and broadcasts it wirelessly throughout your home. This broadcasting creates the Wi-Fi signal your devices detect. Many modern devices combine the modem and router into one unit, which often makes setup simpler.
Your Wi-Fi Network Name (SSID) and Password
Every Wi-Fi network has a unique name, called an SSID (Service Set Identifier), and a password. You need both to connect your devices. Your router usually has a sticker on it with the default network name and password. You may have changed these during initial setup.
- Network Name (SSID): This is the name you see appear on your phone or computer when you look for Wi-Fi networks. It might be something like “MyHomeNetwork” or “Linksys12345.”
- Password (Network Key or Security Key): This is the code you type in to gain access to your network. It ensures only authorized devices connect to your Wi-Fi, keeping your home network secure.
It is crucial to know your network name and password before attempting to connect any device. You can usually find these details on a sticker on the bottom or side of your router.

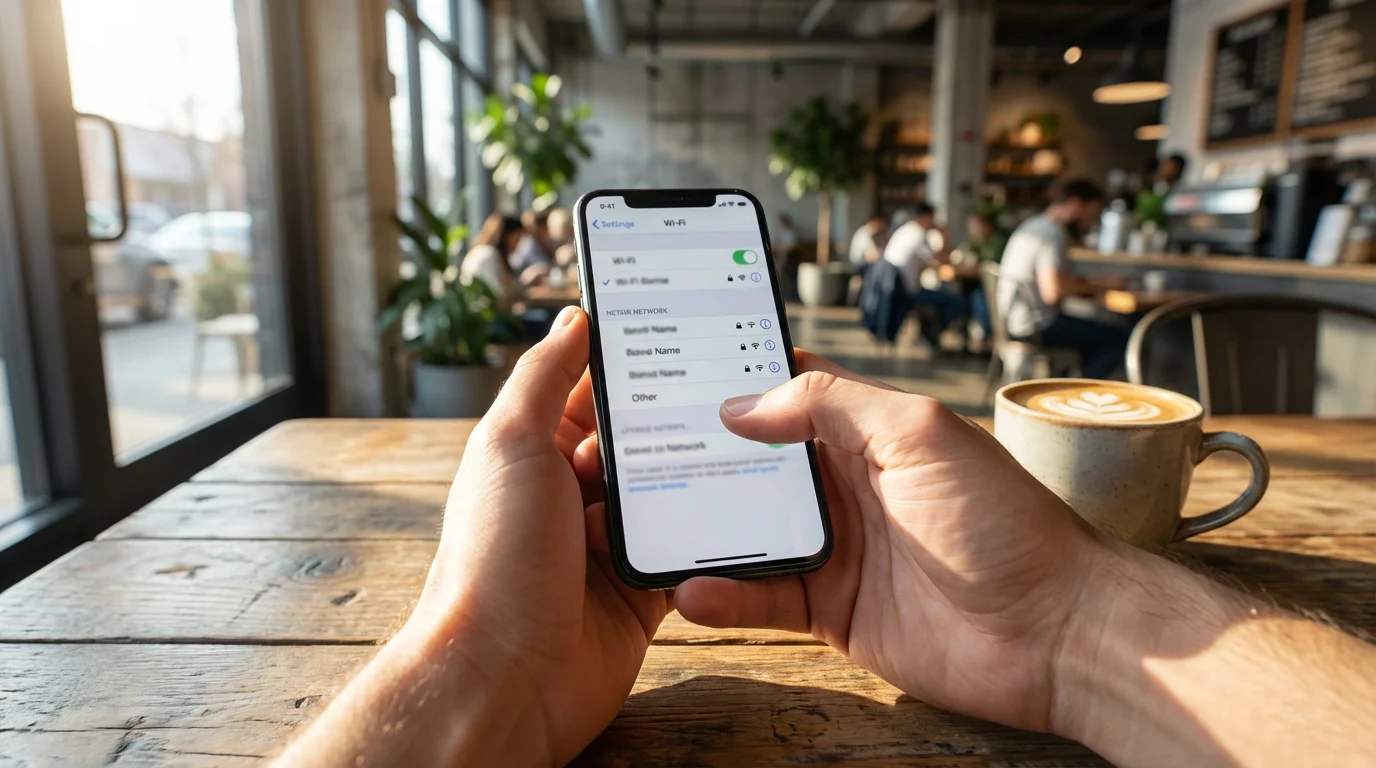
Connecting Your Smartphone or Tablet to Wi-Fi
Connecting your phone or tablet to Wi-Fi is a straightforward process. The steps are very similar for both Apple (iPhone, iPad) and Android devices.
Connecting to Wi-Fi at home is also a great way to save on data costs if you are using one of the best cell phone plans for seniors.
For Apple iPhone or iPad:
- Open Settings: On your home screen, tap the icon that looks like a gray gear (⚙️). This opens your device’s settings menu.
- Find Wi-Fi: In the Settings menu, you will see an option labeled “Wi-Fi.” Tap on it.
- Turn On Wi-Fi: Ensure the Wi-Fi switch is in the “On” position. It usually glows green when active. If it is gray, tap it to turn it on.
- Select Your Network: Your device will now search for available Wi-Fi networks and list them. Look for your home network’s name (SSID) in this list. Tap on it.
- Enter Password: A box will appear asking for your Wi-Fi password. Carefully type your password into this field. Passwords are case-sensitive, meaning capital letters must be typed as capitals and lowercase as lowercase.
- Join the Network: Tap the “Join” button. Your device will attempt to connect.
- Confirm Connection: Once connected, you will see a checkmark next to your network’s name and a small Wi-Fi symbol (looks like three curved lines getting smaller from bottom to top, similar to a radio signal) will appear at the top of your screen.
For Android Phone or Tablet:
- Open Settings: Swipe down from the top of your screen to reveal the Quick Settings panel, then tap the gear icon (⚙️) to open your device’s full settings. Alternatively, look for a “Settings” app icon on your home screen or app drawer.
- Find Network & Internet: In the Settings menu, look for “Network & internet” or “Connections.” Tap on it.
- Select Wi-Fi: You will see an option for “Wi-Fi.” Tap on it.
- Turn On Wi-Fi: Make sure the Wi-Fi switch is toggled to the “On” position. It usually changes color, like blue or green, when active.
- Select Your Network: Your device will scan for available networks and display them. Find your home network’s name (SSID) in the list and tap it.
- Enter Password: A box will pop up, prompting you to enter your Wi-Fi password. Type your password carefully, remembering that it is case-sensitive.
- Connect to the Network: Tap the “Connect” button. Your device will try to establish a connection.
- Confirm Connection: After connecting, you will see “Connected” or “Saved, Connected” under your network’s name, and a Wi-Fi symbol will appear at the top of your screen.
You can verify your connection by opening a web browser like Chrome or Safari and trying to visit a website like Senior Planet. If the website loads, you are successfully connected to your wifi connection.

Connecting Your Computer to Wi-Fi
Connecting a laptop or desktop computer to Wi-Fi follows a similar logic to phones and tablets, though the exact icons and menu locations differ slightly between Windows and Mac computers.
To make your time online more enjoyable, consider creating an ergonomic home office that supports good posture while you browse.
With your computer successfully connected, you can begin exploring online learning resources to master new hobbies for free.
For Windows Computers:
- Locate the Wi-Fi Icon: In the bottom right corner of your screen, near the clock, you will see a series of icons. Look for the Wi-Fi icon, which often looks like a series of ascending bars or a small globe (🌐). Click on this icon.
- Open Network Settings: A panel will open showing available Wi-Fi networks. If you see a button labeled “Wi-Fi,” make sure it is turned “On” and shows as blue or highlighted.
- Select Your Network: Find your home network’s name (SSID) in the list. Click on it.
- Connect Automatically (Optional): You may see a checkbox labeled “Connect automatically.” Checking this box tells your computer to remember this network and connect to it every time it is in range. This saves you from manually connecting each time.
- Click “Connect”: After selecting your network, click the “Connect” button.
- Enter Password: A box will appear asking for the “Network security key,” which is your Wi-Fi password. Type your password carefully, ensuring correct capitalization.
- Confirm Connection: Click “Next” or “OK.” Your computer will connect, and the Wi-Fi icon in the bottom right corner will show a solid connection, usually with bars indicating signal strength.
For Mac Computers:
- Locate the Wi-Fi Icon: In the top right corner of your screen, in the menu bar, look for the Wi-Fi icon, which resembles a series of curved lines (similar to a slice of pie). Click on this icon.
- Turn On Wi-Fi: If Wi-Fi is off, click “Turn Wi-Fi On.” The icon will change to show it is active.
- Select Your Network: A dropdown menu will show available networks. Find your home network’s name (SSID) and click on it.
- Enter Password: A dialogue box will appear asking for your Wi-Fi password. Type your password accurately, paying attention to uppercase and lowercase letters.
- Click “Join”: Click the “Join” button.
- Confirm Connection: Once connected, you will see a checkmark next to your network’s name in the Wi-Fi menu, and the Wi-Fi icon in the menu bar will show a full signal.
Securing Your Wi-Fi Connection: Keeping Your Home Network Safe
Connecting to Wi-Fi safely is essential for protecting your personal information. An unsecured network is like an open door for anyone to peek into your online activities or even access your devices. Here are the steps to ensure your home network remains secure.
Maintaining a private, password-protected network is especially critical when managing your finances online to keep your banking details safe.
Use a Strong, Unique Password
Your Wi-Fi password is the first line of defense for your home network. A strong password makes it very difficult for unauthorized individuals to access your internet connection.
- Complexity: Use a combination of uppercase and lowercase letters, numbers, and special characters (!, @, #, $).
- Length: Aim for at least 12-16 characters. Longer passwords are harder to guess.
- Uniqueness: Avoid using easily guessable information such as birthdays, addresses, or common phrases.
- Change Default Password: If your router still uses the password printed on its label, change it immediately. Default passwords are often publicly known or easy to crack.
Protect Your Network Name (SSID)
While you need to know your network name, you can make it less obvious to strangers.
- Avoid Personal Information: Do not include your name, address, or other identifying details in your Wi-Fi network name.
- Consider Hiding Your SSID: Some routers allow you to hide your network name so it does not appear in public lists. While this adds a layer of privacy, it also means you will need to manually enter the network name and password on every device you connect.
Enable Network Encryption
Most modern routers automatically use strong encryption, like WPA2 or WPA3, which scrambles your data as it travels wirelessly. This makes it unreadable to anyone trying to intercept your information.
- Check Your Router Settings: You can usually check your router’s security settings by typing its IP address into a web browser. The IP address is often found on the same sticker as your network name and password.
- Prioritize WPA2/WPA3: Always choose WPA2 (Wi-Fi Protected Access II) or WPA3 if your router offers it. These are the most secure options. Avoid older security types like WEP, which are no longer considered safe.
These measures contribute significantly to a secure home network. The Federal Trade Commission (FTC) offers additional valuable resources on online security for consumers.
Optimizing Your Wi-Fi Experience for Better Performance
Once you are connected, you might want to ensure your Wi-Fi works as efficiently as possible. A few simple adjustments can significantly improve your senior internet experience.
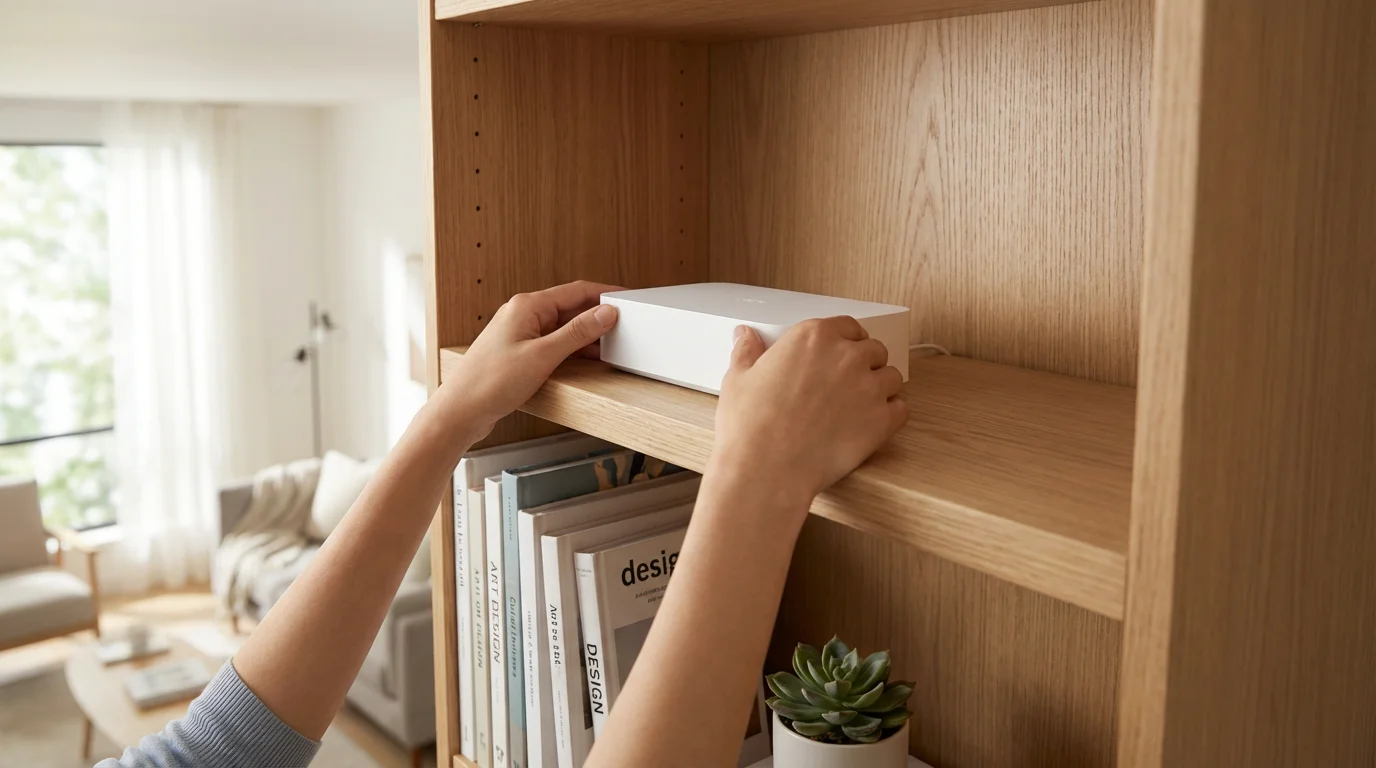
Router Placement Matters
Where you place your router significantly impacts signal strength throughout your home.
- Central Location: Place your router in a central location in your home, ideally in an open area. This allows the signal to spread evenly.
- Avoid Obstructions: Walls, especially thick concrete or brick, large metal objects, and even appliances like refrigerators can block or weaken Wi-Fi signals. Try to keep your router clear of these.
- Elevated Position: Placing your router on a higher shelf or table can often improve coverage, as signals tend to travel downward.
Minimize Interference
Other electronic devices can interfere with your Wi-Fi signal, causing slower speeds or dropped connections.
- Common Sources of Interference: Cordless phones, microwaves, Bluetooth devices, and even baby monitors can use similar radio frequencies to Wi-Fi.
- Keep Distance: Try to keep your router and Wi-Fi-connected devices a reasonable distance from these potential interference sources.
Consider Your Internet Speed Plan
Your Wi-Fi can only be as fast as the internet service you pay for. If you consistently experience slow speeds, even when close to the router, your internet plan might be the bottleneck.
- Check Your Plan: Review your internet service provider’s plan details. If you have many devices or stream a lot of high-definition video, you might need a faster plan.
- Perform a Speed Test: You can easily find free online speed test websites by searching “internet speed test” in your web browser. These tests measure your current download and upload speeds.
Troubleshooting Common Wi-Fi Problems: What to Do When Wi-Fi Doesn’t Work
Even with the best setup, Wi-Fi can sometimes be temperamental. If your internet connection stops working or feels slow, do not get discouraged. Most common Wi-Fi problems have simple solutions. Here is what to do when wifi doesn’t work:
- Restart Your Device:
- Why it helps: This is often the simplest fix. Restarting your phone, tablet, or computer can clear minor software glitches that affect your Wi-Fi connection.
- How to do it: Turn your device completely off, wait about 30 seconds, and then turn it back on.
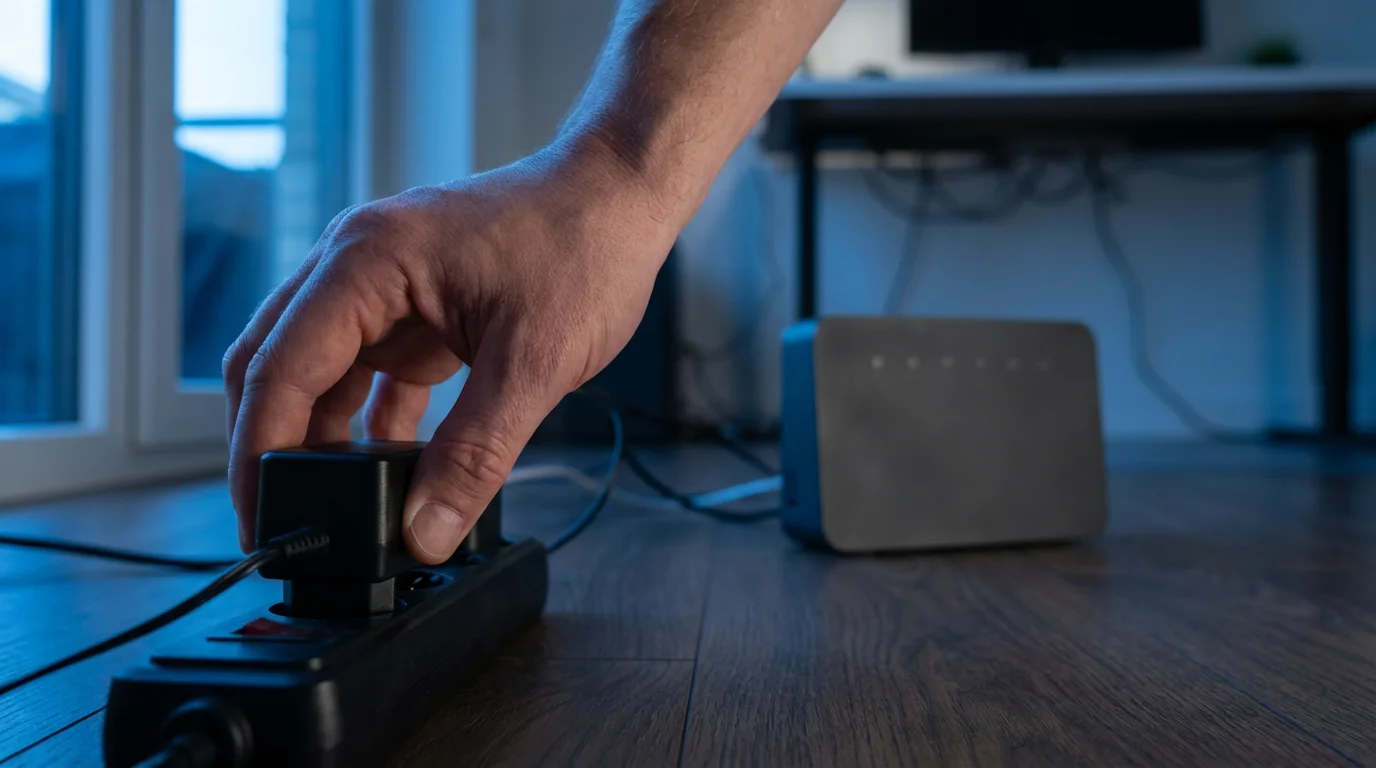
- Restart Your Router and Modem:
- Why it helps: Your router and modem are like small computers. Restarting them clears their memory and can resolve many connection issues.
- How to do it:
- Locate your modem and router (if they are separate devices).
- Unplug the power cord from both devices.
- Wait for at least 60 seconds. This allows the devices to fully power down and clear their system.
- Plug the power cord back into the modem first. Wait for all the lights on the modem to become stable (this can take a few minutes).
- Then, plug the power cord back into the router. Wait for all its lights to stabilize.
- Once both are fully powered up, try connecting your device to Wi-Fi again.
- Check Cables and Connections:
- Why it helps: Loose or disconnected cables are a surprisingly common cause of internet outages.
- How to do it: Ensure all cables connecting your modem to the wall and your router to the modem (if separate) are securely plugged in.
- Forget the Network and Reconnect:
- Why it helps: Sometimes your device remembers old or incorrect network settings. “Forgetting” the network forces your device to treat it as a brand new connection.
- How to do it:
- Go to your device’s Wi-Fi settings.
- Tap or click on your home network’s name.
- Look for an option like “Forget This Network,” “Remove Network,” or “Delete.” Select it.
- Then, follow the steps outlined earlier in this article to reconnect to your Wi-Fi network from scratch, entering your password again.
- Move Closer to the Router:
- Why it helps: If you are far from the router or behind many walls, your signal might be too weak.
- How to do it: Temporarily move your device closer to your router to see if the connection improves. If it does, your issue might be related to signal range or interference.
- Check for Service Outages:
- Why it helps: Sometimes the internet problem is not in your home, but with your internet service provider.
- How to do it: Use your phone’s cellular data (if available) or a neighbor’s Wi-Fi to visit your ISP’s website or call their customer service. Ask if there are any known outages in your area.
If these steps do not resolve your senior internet issues, it may be time to contact your internet service provider or seek assistance from a trusted family member or tech support. Remember, it is okay to ask for help.
Quick Reference: Connecting to Wi-Fi
Here is a simplified overview of the general steps to connect any device to Wi-Fi. Keep this in mind for a quick reminder.
- Find Your Network Name (SSID) and Password: Look on your router’s sticker.
- Go to Settings: Access the “Settings” app on your device.
- Find Wi-Fi: Locate and tap on the “Wi-Fi” or “Network & internet” section.
- Turn On Wi-Fi: Ensure Wi-Fi is enabled.
- Select Your Network: Tap or click on your home network’s name from the list.
- Enter Password: Carefully type in your Wi-Fi password.
- Connect: Tap “Join” or “Connect.”
- Confirm: Look for the Wi-Fi symbol at the top of your screen.
Frequently Asked Questions
Can I connect to public Wi-Fi safely?
Public Wi-Fi, often found in coffee shops, airports, or libraries, can be convenient, but it carries security risks. These networks are often unsecured, meaning your data could be intercepted by others. Avoid conducting sensitive activities like online banking or shopping when using public Wi-Fi. Consider using a VPN (Virtual Private Network) for added security if you frequently use public networks.
What is the difference between 2.4 GHz and 5 GHz Wi-Fi?
These refer to different frequency bands your router uses. The 2.4 GHz band offers a wider range and better penetration through walls but is generally slower and more prone to interference. The 5 GHz band provides faster speeds and less interference but has a shorter range. Many modern routers use both, creating separate network names or automatically switching your device to the best option.
Why is my Wi-Fi slow, even though I have a fast internet plan?
Several factors can cause slow Wi-Fi. These include too many devices using the network simultaneously, poor router placement, interference from other electronics, outdated router hardware, or even an issue with your device. Try troubleshooting steps such as restarting your router, moving closer to it, or checking for interference. If problems persist, contact your internet service provider.
What if I forgot my Wi-Fi password?
If you forgot your Wi-Fi password, first check the sticker on your router for the default password. If you changed it and cannot remember, you may need to access your router’s administration page via a web browser (you will need to be connected to the router, perhaps via an Ethernet cable, to do this). Alternatively, you can perform a factory reset on your router, which will revert it to its default settings, including the password printed on the sticker. Note that a factory reset means you will need to reconnect all your devices to the network and reconfigure any custom settings.
Is Wi-Fi free?
To have Wi-Fi in your home, you typically need to pay for an internet service plan from a provider. The Wi-Fi itself, which is the wireless signal emitted by your router, is a feature of that paid internet service. While you might find free public Wi-Fi in certain locations, your home Wi-Fi relies on an ongoing subscription to an internet service provider.
You have now explored the world of Wi-Fi, from understanding its basics to connecting your devices and troubleshooting common issues. Taking these steps empowers you to navigate your online world with greater ease and confidence. Remember, practice makes perfect, and every time you connect, you build your digital literacy.
Disclaimer: This article is for informational purposes only. Device interfaces and features may vary depending on your device model and software version. Screenshots and steps are based on common versions but your experience may differ slightly. When in doubt, consult your device manufacturer’s official support resources.


Leave a Reply