Your bathroom represents a critical space for maintaining independence and personal dignity as you age. However, it also presents significant risks, making it one of the most dangerous rooms in your home. Adapting your bathroom for senior living proactively enhances your comfort, safety, and overall ability to age in place confidently. This guide provides practical, actionable insights to help you create a more accessible and secure bathroom environment.
Proactively addressing these hazards can help lower daily stress, allowing you to focus on the benefits of mindfulness and meditation in your home environment.

Understanding Bathroom Risks and Why Accessibility Matters
Bathrooms pose unique challenges for seniors, contributing to a high percentage of home fall incidents. The combination of hard, often slippery surfaces, confined spaces, and the need for balance during daily routines increases the risk. The Centers for Disease Control and Prevention, CDC, reports that more than one in four adults aged 65 and older fall each year, with many falls occurring in the bathroom.
While focus is often on physical hazards, maintaining a safe home also involves considering home security for seniors to protect your peace of mind.
Proactive modifications can significantly reduce these risks. By addressing potential hazards before they cause an accident, you maintain your independence and comfort at home. Accessibility in your bathroom means designing the space to be easily usable by everyone, regardless of age or physical ability.
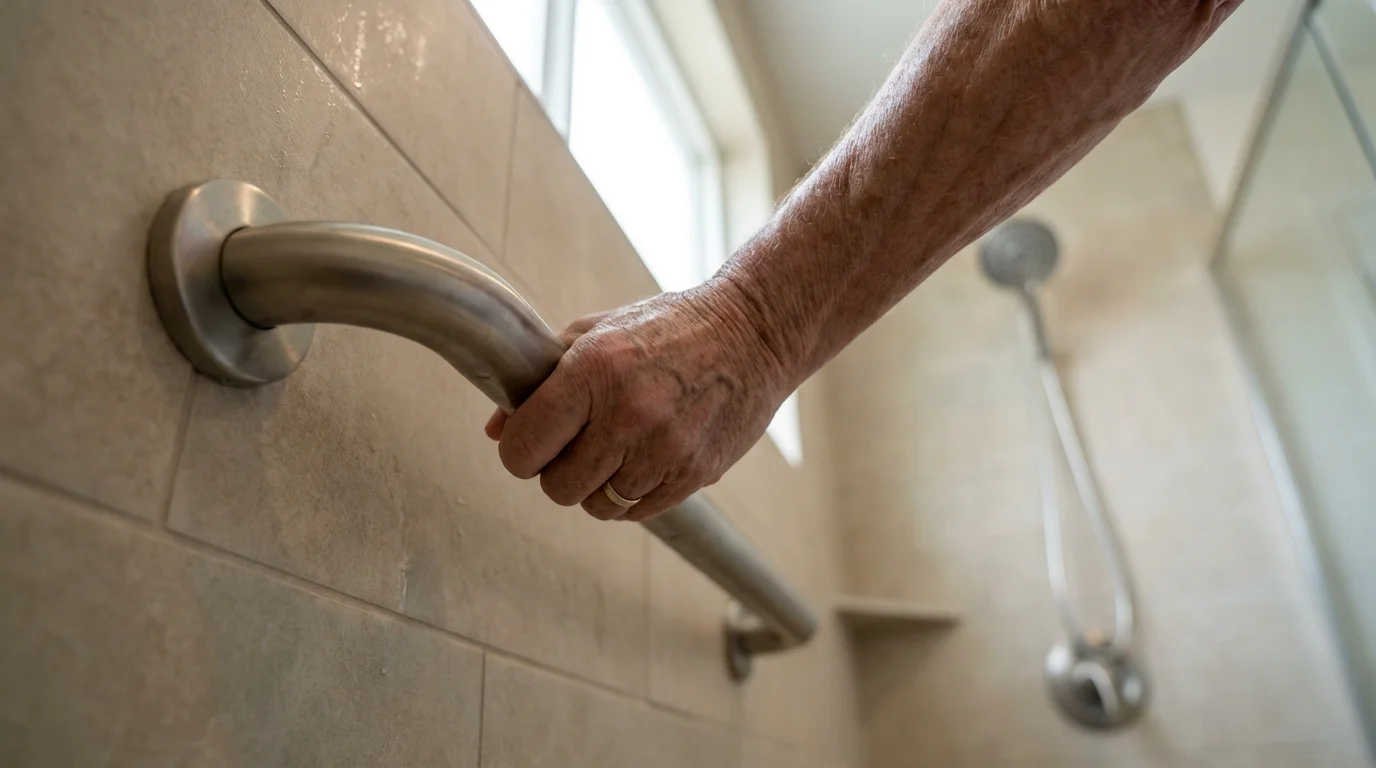
Essential Grab Bars: Your Foundation for Bathroom Safety
Installing grab bars provides crucial support and stability, significantly reducing the risk of falls. You want to place them strategically where you transition positions, such as entering or exiting the shower, standing from the toilet, or moving around the vanity. Selecting the right type and ensuring proper installation are paramount for safety.
Types of Grab Bars
- Horizontal Grab Bars: These offer support for standing up or sitting down, ideal for next to the toilet or inside a shower.
- Vertical Grab Bars: Install these near the shower or tub entry to help with balance when stepping over a threshold.
- Angled Grab Bars: Combining horizontal and vertical benefits, angled bars can be helpful in specific areas where a diagonal grip feels more natural, such as inside a shower.
- Suction Cup Grab Bars: While easy to install, use these with extreme caution and only for temporary, light support. They are not reliable for bearing full body weight during a fall. Always opt for permanently mounted bars for maximum safety.
Strategic Placement
Proper placement makes grab bars effective. Consider these key areas:
- Inside the Shower/Bathtub: Install at least two grab bars: one horizontally on the back wall, and another vertically near the faucet end. You might also want a diagonal bar on the side wall for easier maneuverability.
- Beside the Toilet: A horizontal grab bar mounted 33-36 inches from the floor, extending 12 inches past the front of the toilet, offers crucial support for standing and sitting.
- Near the Vanity/Sink: A vertical bar can provide assistance when moving to and from the sink.
An ounce of prevention is worth a pound of cure. Taking steps to secure your bathroom now prevents potential injuries later.
Installation and Cost
For maximum security, always mount grab bars directly into wall studs. If stud placement is not ideal, use secure anchors designed for significant weight bearing. While some handy individuals can manage installation, consider hiring a professional. Improper installation renders grab bars unsafe.
The cost for grab bars themselves ranges from $20 to $100 per bar, depending on material and length. Professional installation can add $75 to $150 per bar, or more for complex jobs. For example, installing two heavy-duty grab bars in your shower might cost approximately $40 to $200 for the bars, plus $150 to $300 for professional installation.
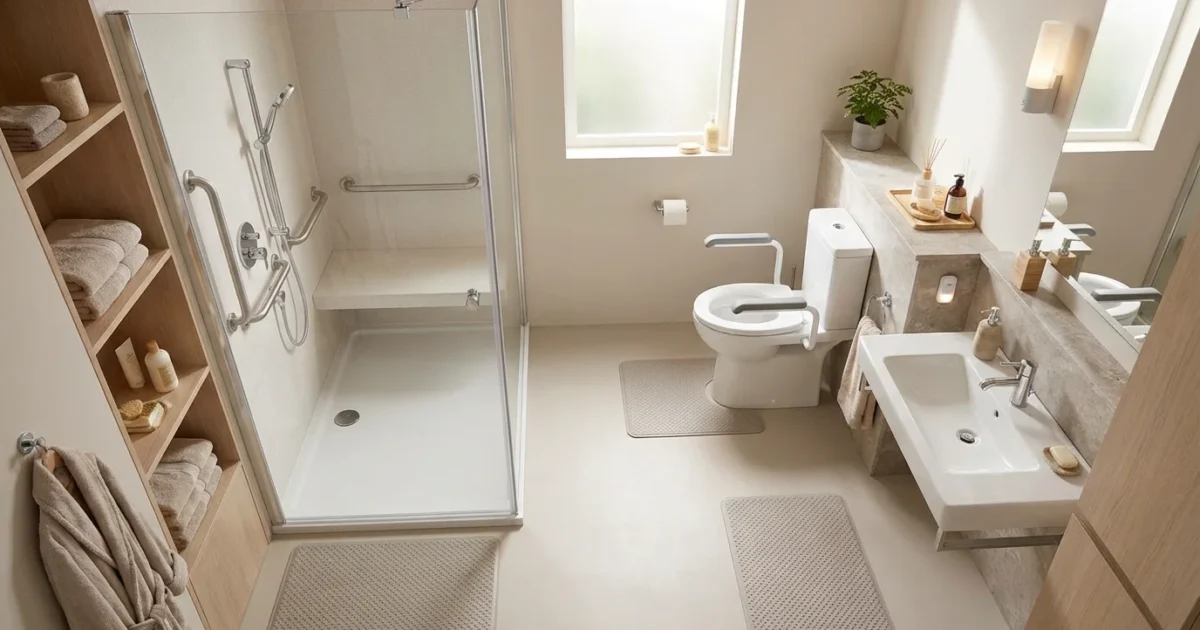
Upgrading Your Shower and Bathtub for Easier Access
Stepping into or out of a shower or bathtub poses one of the highest fall risks. Several modifications can transform this hazardous area into a safe and comfortable space.
Walk-In Showers: The Ultimate Accessibility Upgrade
A walk-in shower, featuring a curbless or low-threshold entry, eliminates the need to step over a high edge. This significantly reduces the risk of tripping and makes shower access much easier, especially for those using wheelchairs or walkers.
- Benefits: Enhanced safety, easier entry/exit, accommodates mobility aids, spacious for assistance if needed.
- Considerations: Requires professional installation, often involves plumbing work, higher cost.
- Cost Estimate: A full walk-in shower conversion can range from $5,000 to $15,000 or more, depending on materials, size, and complexity.
Shower Chairs and Transfer Benches
For a less intensive and more immediate solution, a shower chair or transfer bench offers a secure place to sit while bathing. This eliminates the need to stand for extended periods, conserving energy and reducing fall risk.
- Shower Chairs: Designed to fit inside the shower, providing stability. Choose one with non-slip feet and sturdy construction.
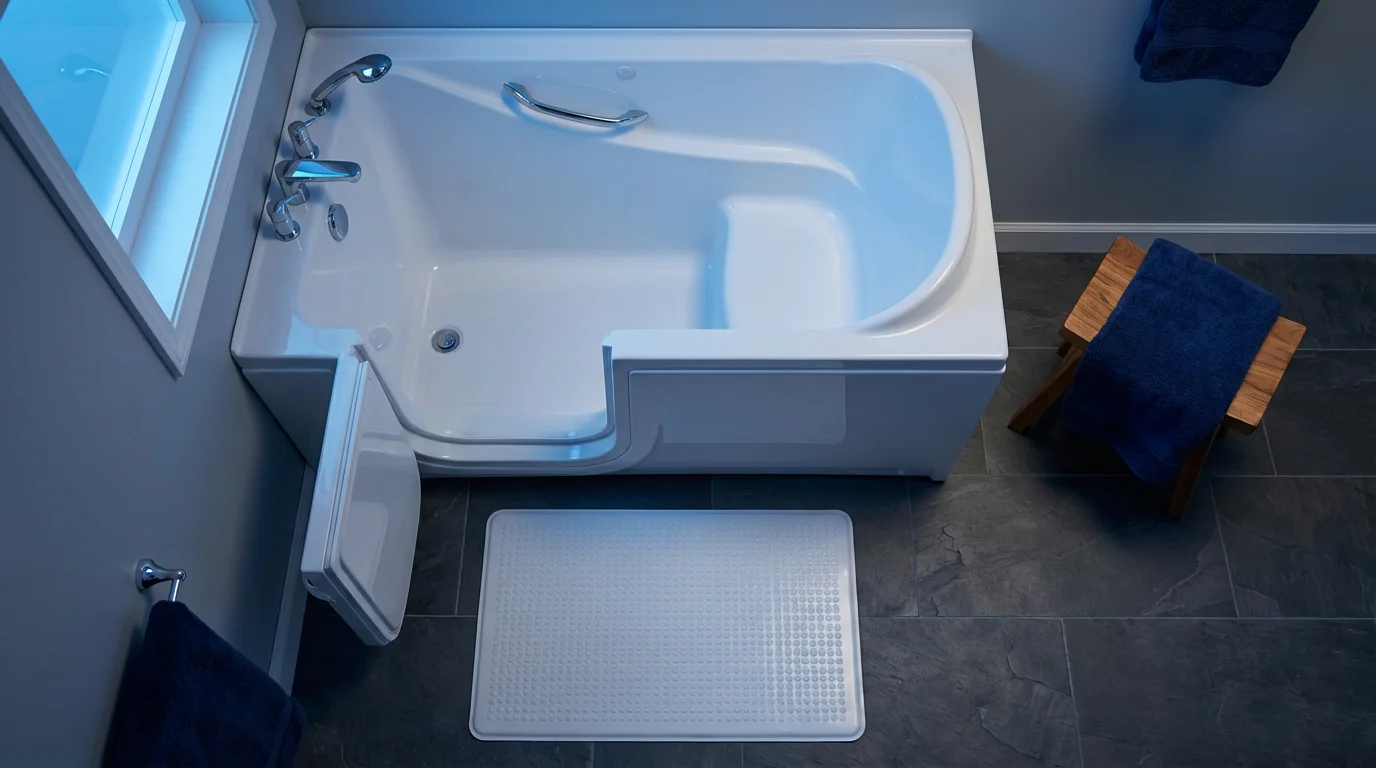
- Transfer Benches: These extend beyond the tub edge, allowing you to sit down outside the tub and slide over into it. This is excellent for traditional bathtubs.
- Cost Estimate: Basic shower chairs or transfer benches typically cost $30 to $150.
Handheld Showerheads
A handheld showerhead, combined with a shower chair, allows you to direct water effectively while seated. This provides greater control and comfort during bathing.
- Benefits: Increased independence, easier to rinse all areas, useful for washing hair while seated.
- Cost Estimate: Handheld showerheads range from $20 to $150, with installation typically being a straightforward DIY task or a minimal cost from a handyman.
Non-Slip Surfaces
Ensure your shower or tub floor has a non-slip surface. You can achieve this through textured bath mats with suction cups, non-slip adhesive strips, or professional anti-slip coatings.
- Important Note: Regularly clean non-slip mats and strips to prevent mildew buildup, which can compromise their effectiveness and hygiene.
- Cost Estimate: Non-slip mats or adhesive strips are very affordable, typically $10 to $30. Professional anti-slip coatings might cost $100 to $300.
Enhancing Toilet Accessibility for Comfort and Independence
Sitting down and standing up from a standard-height toilet can be challenging, especially for individuals with knee, hip, or balance issues. Modifications exist to make this routine task safer and more comfortable.
Raised Toilet Seats
A raised toilet seat increases the toilet’s height, reducing the distance you need to lower yourself or push up from. These come in various styles:
- Clip-on or Locking Models: These fit directly onto your existing toilet bowl and can be removed when not needed. Ensure they are securely attached.
- Toilet Seats with Integrated Risers: These replace your existing toilet seat entirely, offering a more permanent and stable solution.
- Cost Estimate: Raised toilet seats range from $20 to $100.
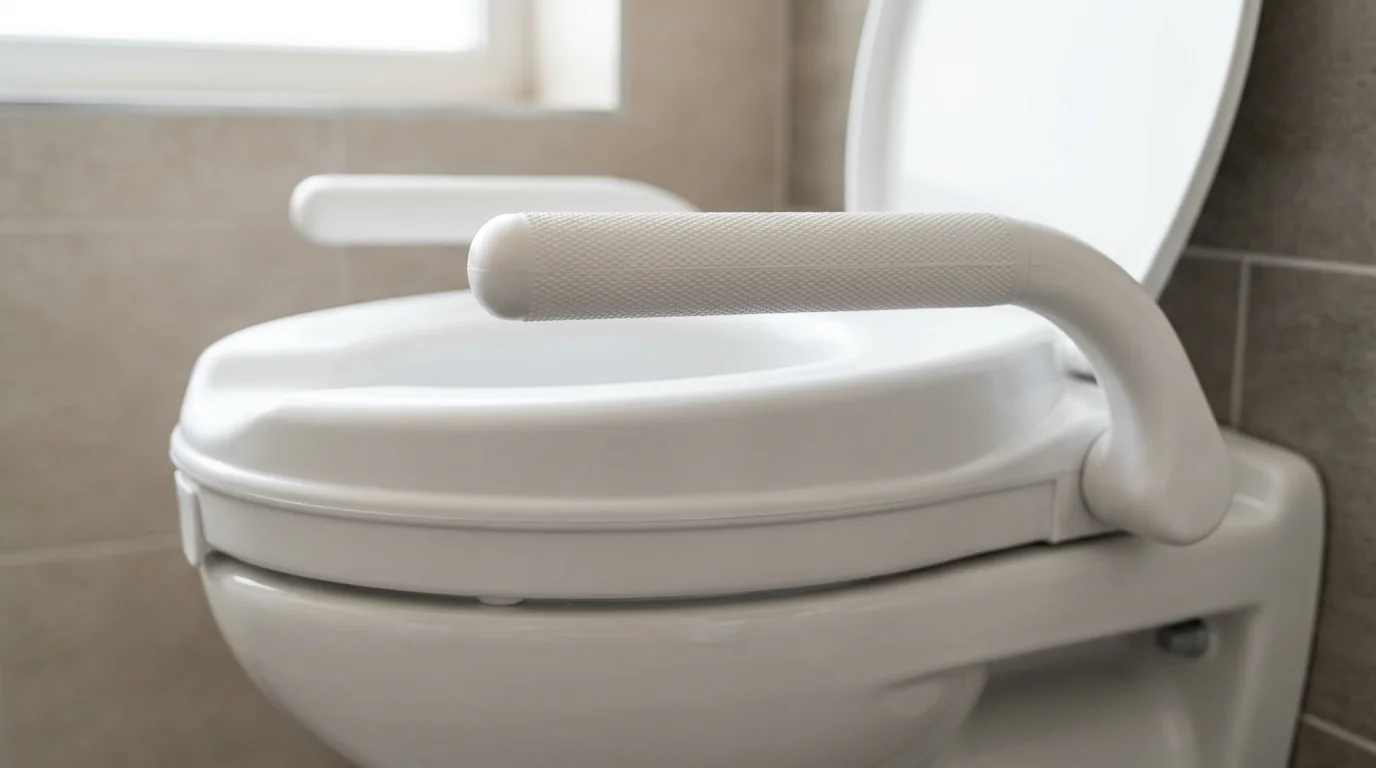
Toilet Safety Frames
A toilet safety frame provides armrests on either side of the toilet, offering additional support for standing and sitting. These frames usually attach to the toilet or stand independently around it.
- Benefits: Provides stable handholds, reduces strain on joints, enhances security.
- Cost Estimate: Toilet safety frames typically cost $40 to $150.
Comfort-Height Toilets
If you are planning a full bathroom remodel, consider installing a comfort-height toilet. These toilets are typically 17 to 19 inches tall, similar to a standard chair height, making them much easier to use than traditional lower toilets.
- Cost Estimate: A comfort-height toilet fixture costs $200 to $500, plus installation by a plumber, which can add $150 to $300.
Bidet Attachments
While primarily for hygiene, bidet attachments also offer a significant advantage for independence. They reduce the need for twisting or reaching, making personal hygiene easier and safer for those with limited mobility.
- Cost Estimate: Simple bidet attachments that connect to your existing toilet seat can cost $30 to $100. More advanced bidet toilet seats with features like heated water and air dryers range from $200 to $600+.
Flooring, Lighting, and Faucets: Details That Enhance Safety
Beyond major fixtures, several other elements contribute significantly to bathroom safety and ease of use. Paying attention to these details prevents accidents and enhances comfort.
Safe Flooring Choices
Slippery floors are a major cause of bathroom falls. Choose flooring materials that offer good traction, even when wet.
- Non-Slip Tiles: Look for ceramic or porcelain tiles with a textured finish or a high coefficient of friction rating. Smaller tiles with more grout lines also provide better grip.
- Vinyl Flooring: Modern vinyl planks or sheets are often water-resistant and provide a softer, warmer, and less slippery surface than traditional tile.
- Rubber Flooring: While less common in residential bathrooms, rubber flooring offers excellent slip resistance and cushioning.
- Avoid: Highly polished, smooth tiles, or thick, shaggy bath rugs that can bunch up and create tripping hazards. If you use bath mats, ensure they have non-slip backing and lie flat.
Optimal Lighting
Good lighting helps you navigate safely and reduces shadows that can obscure obstacles.
- Bright, Even Illumination: Ensure the bathroom is well-lit, especially around the shower, toilet, and vanity. Consider overhead lighting combined with task lighting around the mirror.
- Night Lights: Install automatic night lights that activate with motion or darkness. This provides a clear path to the bathroom during nighttime trips, preventing falls in the dark.
- Light Switches: Install large, rocker-style light switches that are easy to operate, even with limited dexterity. Consider illuminated switches for better visibility.
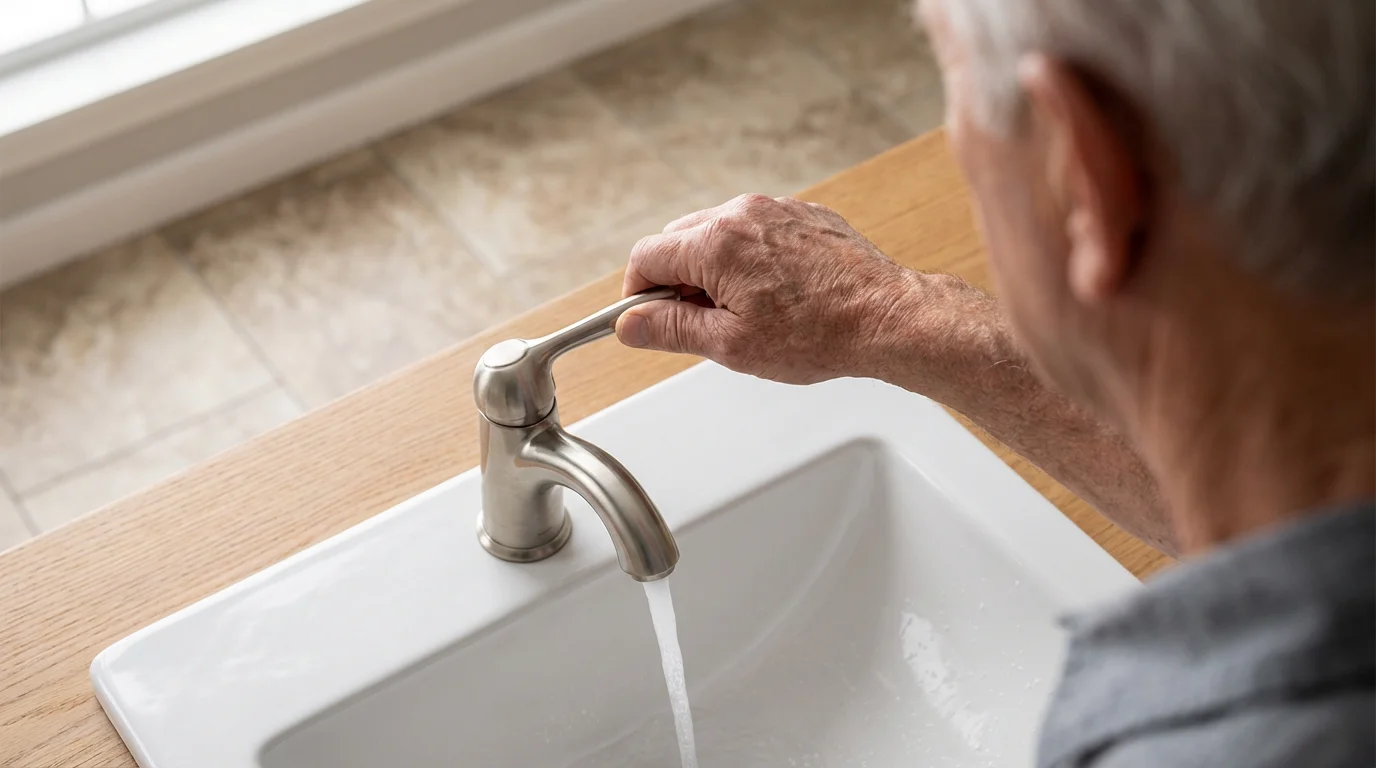
Accessible Faucets and Anti-Scald Devices
Faucets should be easy to operate, and water temperature control is crucial to prevent burns.
- Lever-Style Faucets: Replace traditional knob faucets with single-lever models. These are much easier to grip and turn, especially for those with arthritis or weakened hand strength.
- Motion-Sensor Faucets: For ultimate ease, consider touchless, motion-sensor faucets, though these come at a higher cost.
- Anti-Scald Devices: Install thermostatic mixing valves or pressure-balancing valves in your shower and tub. These devices prevent sudden changes in water temperature, protecting you from accidental burns. The Consumer Product Safety Commission, CPSC, recommends setting your water heater to 120 degrees Fahrenheit to prevent scalding.
Smart Storage and Organization for a Clutter-Free Space
A well-organized bathroom is a safe bathroom. Clutter, especially on the floor, creates tripping hazards. Strategic storage and thoughtful organization make items easily accessible, reducing strain and the risk of reaching too far or losing balance.
Organizing your storage is easier once you have committed to decluttering your home to remove items that no longer serve you.
Keep Essential Items Within Reach
Store frequently used items—like soap, shampoo, lotions, and toothbrushes—at an easy-to-reach height.
- Adjustable Shelving: Install shelves that you can adjust to your preferred height. Open shelving or pull-out drawers are often more convenient than deep, fixed cabinets.
- Shower Caddies: Use a hanging shower caddy or a corner shelf unit within the shower that keeps toiletries readily available without bending or stretching.
- Vanity Organizers: Keep your countertop clutter-free with small organizers for daily essentials.
Eliminate Clutter and Obstacles
Make sure pathways are clear and free of anything that could cause a trip.
- Remove Unnecessary Items: Regularly declutter your bathroom. Only keep what you frequently use.
- Secure Cords: If you have electrical appliances like hair dryers or electric toothbrushes, ensure their cords are neatly tucked away and do not cross pathways.
- Avoid Floor Storage: Do not store items on the floor. Everything should have a designated place off the floor.
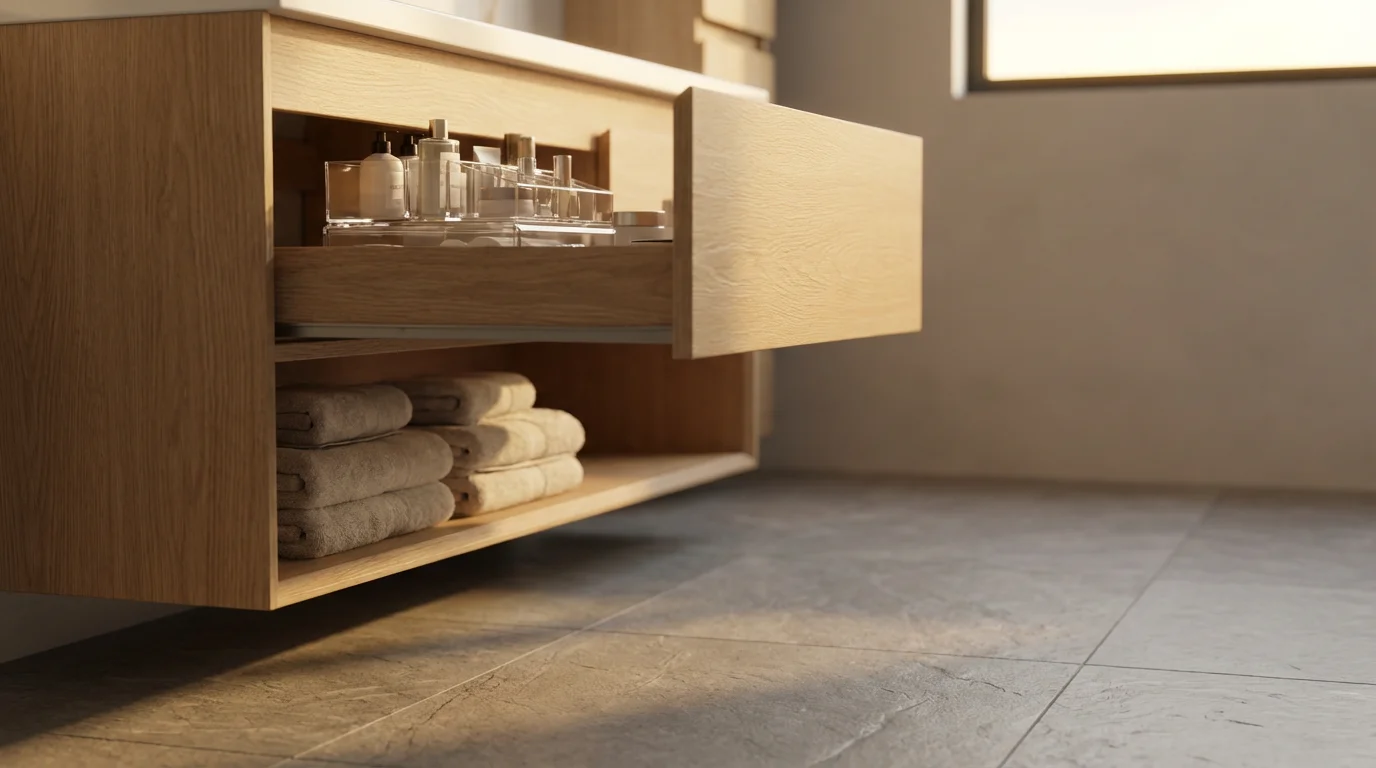
Consider Open Storage and Pull-Outs
Traditional cabinets can be difficult to access due to bending or reaching.
- Open Shelving: Makes items visible and easy to grab without opening doors.
- Pull-Out Drawers and Baskets: Install pull-out shelves or use rolling carts for under-sink storage. This brings items forward, eliminating the need to reach deep into cabinets.
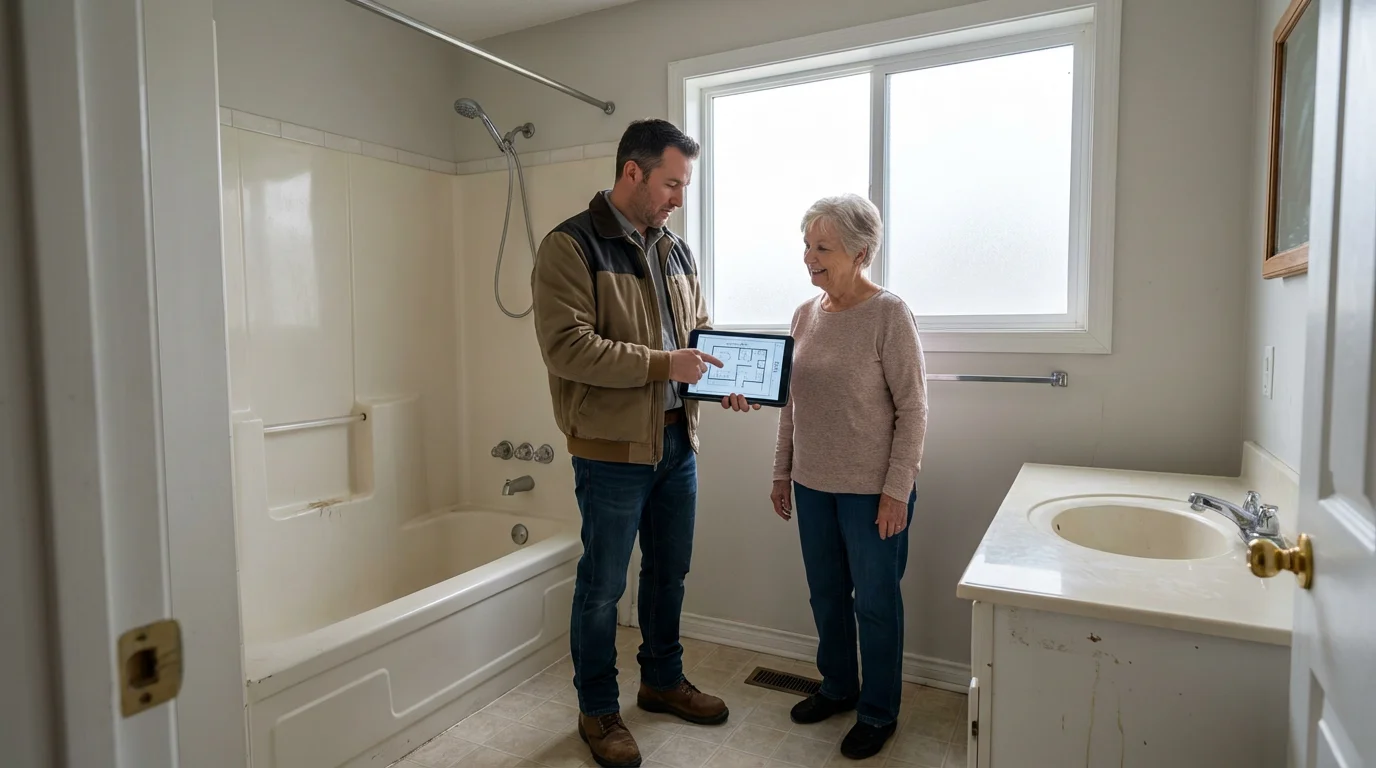
When to Consult Professionals for Bathroom Modifications
While some minor modifications are suitable for a DIY approach, many accessibility updates benefit significantly from professional expertise. Knowing when to call in an expert ensures the work is done safely, correctly, and up to code.
Identifying Complex Projects
Professional assistance is typically required for projects involving:
- Plumbing: Any changes to water lines, drainpipes, or the installation of new fixtures like a walk-in shower or a bidet that requires dedicated plumbing.
- Electrical Work: Installing new lighting, illuminated switches, or moving outlets.
- Structural Changes: Widening doorways, reinforcing walls for grab bars (if studs are not ideally placed), or reconfiguring the bathroom layout.
- Waterproofing: Ensuring a curbless shower is properly sloped and waterproofed to prevent leaks and water damage.
Finding Qualified Professionals
Look for professionals with experience in accessibility modifications.
- Certified Aging-in-Place Specialists (CAPS): These contractors have specialized training from the National Association of Home Builders (NAHB) to modify homes for older adults. You can find them through online directories.
- Licensed Plumbers and Electricians: Always verify that any plumber or electrician you hire is licensed, insured, and has good references.
- Occupational Therapists: An occupational therapist can provide an in-home assessment, identifying specific needs and recommending appropriate modifications tailored to your abilities.
Benefits of Professional Installation
Hiring professionals offers several advantages:
- Safety Assurance: Professionals ensure modifications meet safety standards and are installed correctly, reducing future risks.
- Code Compliance: They understand local building codes and permits required for certain modifications.
- Expert Advice: They can offer insights into the best products and solutions for your specific situation, potentially saving you money and frustration in the long run.
- Warranty: Many professionals offer warranties on their work, providing peace of mind.
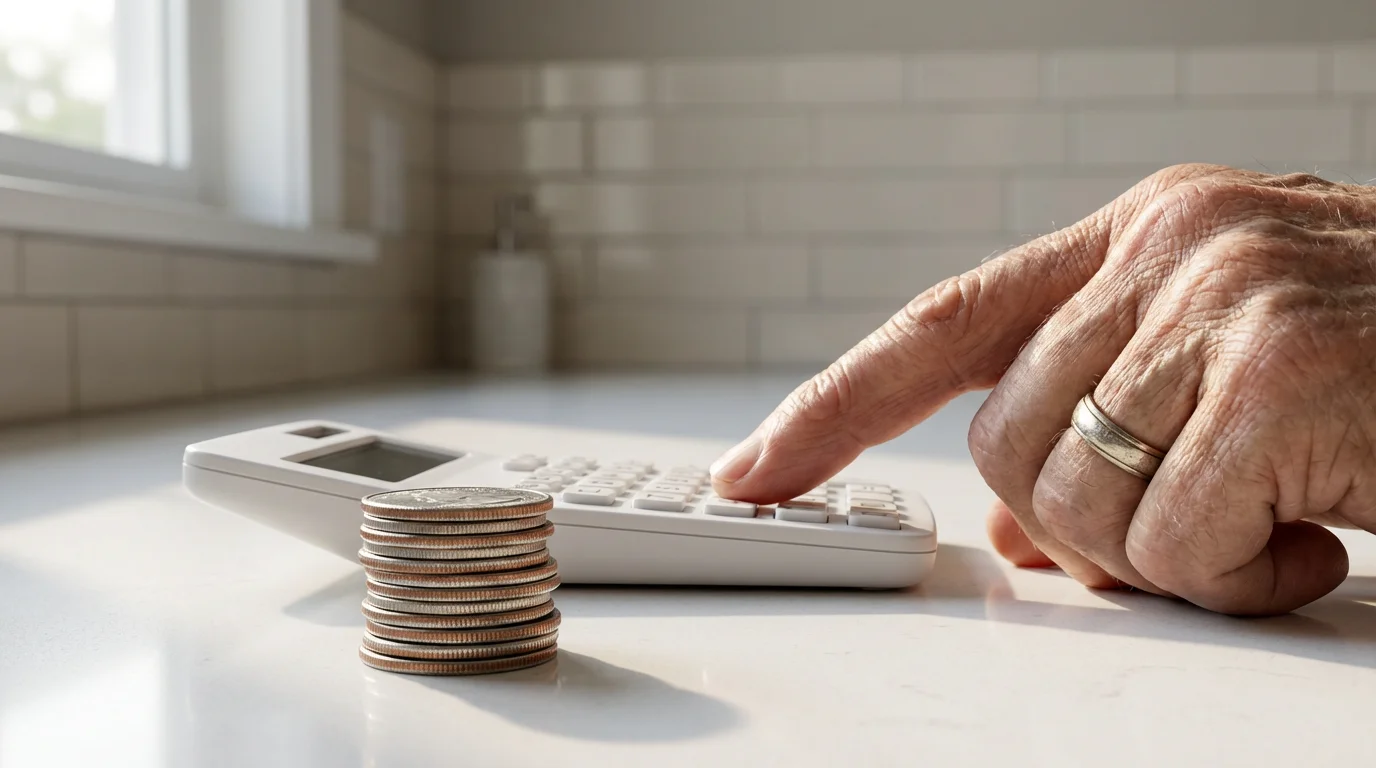
Budgeting for Your Bathroom Accessibility Project
Costs for bathroom accessibility modifications vary widely based on the extent of the changes, materials chosen, and whether you hire professionals or tackle tasks yourself. Planning your budget carefully helps you prioritize and manage expenses effectively.
Proactive home modifications should be factored into your long-term strategy for budgeting for healthcare costs as you age.
Cost Breakdown of Common Modifications
To help you budget, here are approximate cost ranges for common accessibility updates:
- Grab Bars: $20-$100 per bar, plus $75-$150 for professional installation.
- Raised Toilet Seats/Safety Frames: $20-$150 (DIY installation).
- Handheld Showerhead: $20-$150 (DIY friendly).
- Non-Slip Mats/Strips: $10-$30.
- Comfort-Height Toilet: $200-$500 for the fixture, plus $150-$300 for plumber installation.
- Shower Chair/Transfer Bench: $30-$150.
- Bidet Attachment: $30-$600+, depending on features and installation complexity.
- Walk-In Shower Conversion: $5,000-$15,000+ (major renovation, professional required).
- Anti-Scald Devices: $50-$200 for parts, plus $100-$300 for professional installation.
- Professional Home Assessment (Occupational Therapist): $100-$300, often covered by some insurance plans.
Prioritizing Your Modifications
If budget is a concern, prioritize modifications that address the highest risks first:
- Grab Bars: These are often the most impactful and cost-effective safety upgrade.
- Non-Slip Surfaces: Essential for preventing slips in wet areas.
- Raised Toilet Seat/Safety Frame: Improves toilet accessibility significantly.
- Shower Chair/Handheld Showerhead: Reduces fall risk during bathing.
- Improved Lighting and Lever Faucets: Enhance visibility and ease of use.
- Major Renovations: Consider walk-in showers or full bathroom remodels as long-term investments once immediate safety concerns are addressed.
Potential Financial Assistance
Explore options that may help offset costs:
- Medicare/Medicaid: Generally do not cover home modifications unless they are considered durable medical equipment (DME) prescribed by a doctor. Check your specific plan.
- Veterans Affairs (VA) Benefits: The VA offers grants for eligible veterans to make home modifications to accommodate disabilities. Visit USA.gov for housing assistance resources.
- State and Local Programs: Many states and local communities offer grants, loans, or tax credits for home accessibility modifications. Contact your local Area Agency on Aging or Eldercare Locator for information.
- Long-Term Care Insurance: Some policies may cover home modifications that help you age in place. Review your policy details.
Frequently Asked Questions
Can I install grab bars myself, or do I need a professional?
You can install grab bars yourself if you have basic DIY skills, the right tools, and can locate wall studs reliably. However, for maximum safety, especially if you need the bars to support significant weight or if stud placement is challenging, hiring a professional is highly recommended. Improperly installed grab bars can detach and cause serious injury.
What is the most effective way to prevent falls in the shower?
The most effective way to prevent falls in the shower involves a combination of strategies: installing securely mounted grab bars, using a non-slip bath mat or anti-slip strips on the shower floor, and utilizing a shower chair or transfer bench along with a handheld showerhead. For ultimate safety, a curbless walk-in shower is an excellent long-term solution.
Are raised toilet seats stable and safe?
Yes, raised toilet seats are generally stable and safe when properly selected and installed. Ensure you choose a model that securely clips or locks onto your toilet bowl. For even greater stability and support, combine a raised toilet seat with a toilet safety frame that provides armrests. Always follow the manufacturer’s installation instructions.
How do I choose the right non-slip flooring for my bathroom?
When choosing non-slip flooring, look for materials with a textured surface or a high coefficient of friction rating. Good options include textured ceramic or porcelain tiles, vinyl plank flooring, or even rubber flooring. Avoid glossy, smooth tiles, and ensure any bath mats have secure, non-slip backing and lie completely flat to prevent tripping.
What are the benefits of consulting an Occupational Therapist before making modifications?
Consulting an Occupational Therapist, OT, provides personalized recommendations based on your specific physical abilities, mobility challenges, and daily routines. An OT can assess your unique needs, identify potential hazards you might overlook, and suggest the most effective and practical modifications. This tailored advice ensures you invest in solutions that truly enhance your safety and independence.
Disclaimer: This article is for informational purposes only. Home modifications, safety equipment, and services mentioned may vary in availability and suitability for individual circumstances. For significant home modifications, consult with qualified professionals. For health-related safety concerns, consult with healthcare providers.


Leave a Reply